Managing Documents
This section describes how document libraries are set up and explains how to manage website documents.
About Document Libraries
All documents (PDF, Word, XLS, PPT) are organized into document libraries. Access to the document libraries can be controlled by user role, with different permission rules applied to different libraries.
To create and manage Document Libraries in the Admin section, navigate to Site Content >
Documents.
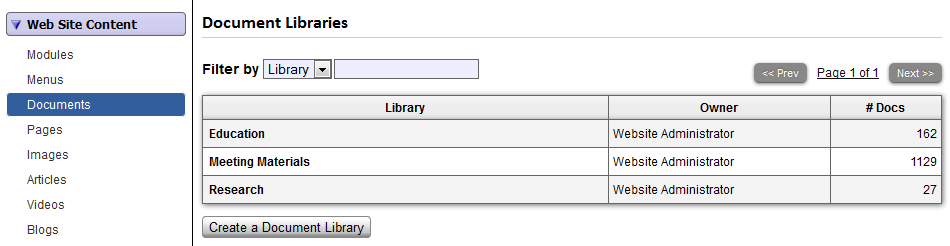
Creating a New Library
On the Document Library home page, you will see a list of all your libraries or a statement that you have not yet created any libraries. Create a new one by clicking on "Add new Library".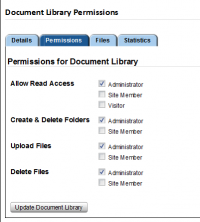
On the Details Tab, add a title and unique indicator for the new library.
On the Permissions Tab, you can set the permissions for the Library.
Adding documents to a library
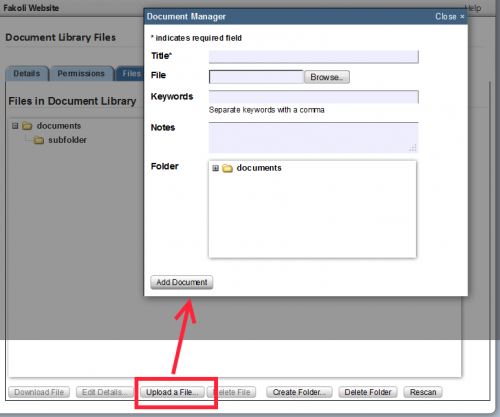
Click on the Files Tab to upload the files into the right library. You can create subfolders or put all your documents in the "documents" folder.
Click on the "Upload a file" button. The document manager dialogue box will open.
The Title should be a meaningful title. Keywords and Notes are optional for your usage. Navigate to the folder or subfolder by clicking on the + next to the folder icon; that will display all the subfolders available in this library. Click the subfolder; by default the document will go in the main folder if no subfolder is selected or available.
Adding a Content Item (such as a Page) to a Section » « Managing Image Galleries
Comments
- crmfoozf
Posted by Homework Research at 2018-02-20 02:45:47essay on helping poor people essays buy essay services [url=http://essays.store]critical essays[/url] - xmjwucpp
Posted by Buy Essays Cheap at 2018-02-11 13:27:33writing my essay writing essay essay writing help [url=https://essaywriting.us.com]ideas to write an essay[/url] - xwgwunwp
Posted by JamesRed at 2018-02-11 12:35:14best payday loan best payday loan online loans online [url=https://bestpaydayloan.stream]best payday loan online[/url] payday loans online direct lender fast payday loan direct payday loan lenders [url=https://paydayloandirectlender.webcam]payday loan direct lender[/url] webcam amateur girl webcam free sex chats [url=https://webcampussy.webcam]pussy webcam[/url] buy essay argumentative essay scholarship essay [url=https://scholarshipessay.science]scholarship essay[/url] easy fast payday loans fast online payday loans easy fast payday loans [url=https://fastpaydayloans.cricket]easy fast payday loans[/url] - omfzlgas
Posted by Write My Thesis at 2018-02-11 10:36:25best college essays ever essay writing writing essay [url=https://essaywriting.us.com]college essay writing[/url] - gmhjzfny
Posted by auto insurance quote at 2018-02-11 09:47:33car insurance comparison cheap car ins auto insurance quotes comparison [url=https://carinsurancequotescomparison.us.com]car insurance quote[/url] - sastvmob
Posted by A Payday Loan at 2018-02-11 05:59:55small loans fast easy payday loans fast online loans [url=https://smallloans.us.com]cash advance america[/url] - jdmghcaw
Posted by Buy Cheap Essays at 2018-02-11 05:52:08write essay for me college essay winners essays [url=https://essays.us.com]writing essays[/url] - yunrkpdp
Posted by Online Payday Loans at 2018-02-11 05:30:00payday loans no direct deposit required credit loans guaranteed approval loan lender [url=https://creditloans.us.com]list of payday loan lenders[/url] - redcnklc
Posted by Buy Essays Cheap at 2018-02-11 02:55:43an argumentative essay argument essay argument essay [url=https://argumentessay.us.com]essays for college[/url] - iooqqpwp
Posted by JamesRed at 2018-02-11 02:31:44best payday loans online best payday loans online best payday loans online [url=https://bestpaydayloans.stream]payday loan companies[/url] paper writing service best essay writing service writing my essay [url=https://bestessaywritingservice.science]dissertation writing[/url] contrast essay write essay essay prompts [url=https://essayprompts.cricket]essay prompts[/url] free erotic chat chat rooms erotic chat rooms [url=https://freechatrooms.webcam]free chat rooms[/url] - quekbfbx
Posted by erie car insurance at 2018-02-11 01:38:37cheap car insurance in pa progressive car insurance car insurance quote [url=https://carinsurancequotescomparison.us.com]auto insurance quotes comparison[/url] - fqywvvtw
Posted by Paper Writer at 2018-02-10 23:09:21write my papers write my paper writing my paper [url=https://writemypaper.us.com]write my paper[/url] - nzuakhlm
Posted by Quick Loan at 2018-02-10 22:57:41installment loans online online installment loans installment loans online [url=https://loansonline.store]installment loans online[/url] - rrapccht
Posted by Aa Seat Assignment at 2018-02-10 19:13:23write my paper write my paper for me admission essay writing service [url=https://writemypaper.us.com]written biography[/url] - ffbwlyxs
Posted by auto insurances at 2018-02-10 17:48:14cheap auto insurance quotes online auto insurance quotes michigan online auto insurance quotes [url=https://autoinsurancequotesonline.us.com]cheap auto insurance online[/url] - ifskknid
Posted by Direct Lenders at 2018-02-10 16:53:23instant payday loan lenders payday loan lenders money lenders [url=https://moneylenders.us.org]payday loans direct lenders[/url] - ptrlsugr
Posted by Payday at 2018-02-10 09:23:34cash advance america scam online loan discover personal loans [url=https://onlineloan.us.com]loan application online[/url] - kwoyztmq
Posted by insurance at 2018-02-10 08:12:19auto insurance quote auto insurance find the lowest auto insurance [url=https://autoinsurancequote.us.com]car insurance quote online[/url] - whtlytrx
Posted by JamesRed at 2018-02-10 03:48:52free live porn chat free sex webcam chat free adult webcam chat [url=https://freeadultwebcamchat.science]free adult webcam chat[/url] free sex webcam free sex webcam free sex webcam [url=https://freesexwebcam.webcam]free webcam sex[/url] quick loans 100 approval quick loans 100 approval small payday loans [url=https://quickloans.cricket]quick loans 100 approval[/url] hot webcam girls erotic chat rooms free sex web chat [url=https://freechatrooms.bid]webcam porn sites[/url] no credit check payday loans payday loans online direct lenders online loans direct lenders [url=https://onlinepaydayloansdirectlenders.science]online payday loans direct lenders[/url] person doing homework write essay person doing homework [url=https://criticalessay.trade]essay checker[/url] bbw webcams porn webcams free bbw webcams [url=https://freexxxwebcams.webcam]free xxx webcams[/url] online payday loan instant approval loans online instant approval payday [url=https://onlinepaydayloaninstantapproval.loan]online lenders[/url] - fcbdgehm
Posted by Buy Custom Essays at 2018-02-10 01:35:14paper writing service buy writing paper paper writing service [url=https://paperwritingservice.us.com]paper writing service[/url] - rfezskfh
Posted by autoowners insurance at 2018-02-09 21:41:55top rated auto insurance companies best car insurance top rated auto insurance companies [url=https://bestcarinsurance.us.com]top rated auto insurance companies[/url] - hjajsobw
Posted by usaa auto insurance at 2018-02-09 20:30:51best car insurance rates best car insurance best car insurance [url=https://bestcarinsurance.us.com]best car insurance[/url] - dforefsr
Posted by Speedycash at 2018-02-09 18:16:28loans no credit check loans for manufactured homes cash loans today [url=https://loansnocreditcheck.us.com]loans no credit check[/url] - pymdnpob
Posted by Easy Payday Loan at 2018-02-09 16:52:43personal loans with bad credit loans personal personal loans [url=https://personalloans.us.org]loans without credit check[/url] - lzgzxcyn
Posted by best insurance rates at 2018-02-09 15:08:13extremely cheap auto insurance extremely cheap auto insurance cheap auto insurance [url=https://cheapautoinsurance.us.org]cheap auto insurance[/url] - cjqaigaa
Posted by aarp auto insurance at 2018-02-09 07:10:45free auto insurance quotes auto insurance quotes online florida best auto insurance companies [url=https://autoinsurancequotes.us.org]online auto insurance quotes[/url] - tbdpyqgk
Posted by A Payday Loan at 2018-02-09 03:56:52cash advance loan cash advance loan cash advance loans [url=https://cashadvanceloan.us.com]online cash advances[/url] - soazmxgx
Posted by Payday Loan Online at 2018-02-09 00:36:38cash loans online cash advance loan online payday advance [url=https://cashadvanceloan.us.com]cash advance loans[/url] - ynvfamoj
Posted by Assignment Operators at 2018-02-08 20:37:34writing my paper write my papers write my custom paper [url=https://writemypaper.us.com]write my custom paper[/url] - ohwbflsg
Posted by cheap insurance at 2018-02-08 14:17:41auto insurance quotes car insurance usaa car insurance quotes [url=https://autoinsurancequotes.us.org]safe auto insurance company[/url] - pyqqizhz
Posted by Getting A Loan at 2018-02-08 14:13:54loan online online loan real payday loans online [url=https://onlineloan.us.com]loan application online[/url] - gvxdfjvb
Posted by Online Essay at 2018-02-08 13:47:18help with my homework college homework help can you do my homework [url=https://homeworkhelp.us.com]homework help online[/url] - aziumndp
Posted by Cash Advance at 2018-02-08 13:29:06alaska loan money lenders california easy loan online [url=https://installmentloans.us.com]installment loans no credit check[/url] - aruoaetj
Posted by geico insurance at 2018-02-08 07:12:26cheap auto insurance cheap auto insurance in florida cheap auto insurance [url=https://cheapautoinsurance.us.org]cheap auto insurance quotes online[/url] - qdopigot
Posted by Payday Loans at 2018-02-08 07:02:54loan lenders for bad credit online loan loan application [url=https://onlineloan.us.com]how to get a payday loan online[/url] - whjpcsan
Posted by Money Loan at 2018-02-08 01:41:06payday loan payday loan no fax payday loan [url=https://paydayloan.us.org]low interest debt consolidation loans[/url] - kkythqxf
Posted by JamesRed at 2018-02-07 22:23:48internet payday loans internet payday loans payday advance online [url=https://internetpaydayloans.stream]internet payday loans[/url] easy payday loan online cash advance easy payday loan [url=https://bestpaydayloan.cricket]quick cash loan[/url] buy research paper online law assignment help research essay [url=https://researchwriting.webcam]research report[/url] advance payday loans online online payday loan application online payday advance [url=https://onlinepaydayadvanceloan.stream]payday advance online[/url] online payday loan lenders payday advance loan fastest payday loan [url=https://fastestpaydayloan.stream]a payday loan[/url] - zczpsxys
Posted by JamesRed at 2018-02-07 17:37:28homework helper essay writing critical essay [url=https://criticalessay.trade]essay checker[/url] easy online payday loans easy online payday loans easy online payday loans [url=https://easyonlinepaydayloans.science]easy online payday loans[/url] chat sex porn live chat free live sex shows [url=https://freewebcamporn.bid]web cam pussy[/url] quick loans quick loans fast payday loan [url=https://quickloans.cricket]quick loans[/url] - brxougwq
Posted by geico car insurance at 2018-02-07 15:21:13cheap full coverage auto insurance cheap full coverage auto insurance cheap auto insurance in florida [url=https://cheapautoinsurance.us.org]cheap auto insurance quotes online[/url] - fvszvfaa
Posted by Write My Essays at 2018-02-07 12:29:41help me with my homework homework help homework help [url=https://homeworkhelp.us.com]logic homework help[/url] - znrcajwg
Posted by aig auto insurance at 2018-02-07 11:01:44best car insurance best car insurance rates best car insurance [url=https://bestcarinsurance.us.com]best car insurance[/url] - eordgckw
Posted by Pay Day Loans at 2018-02-07 06:36:56payday loan payday loan no faxing payday loan [url=https://paydayloan.us.org]payday loan[/url] - kugsqlck
Posted by safeauto insurance at 2018-02-07 05:15:49auto insurance comparison cheap auto insurance extremely cheap auto insurance [url=https://cheapautoinsurance.us.org]cheapest auto insurance in michigan[/url] - jdhodsvs
Posted by Direct Lenders at 2018-02-06 19:35:19installment loan online installment loans installment loans for bad credit [url=https://installmentloans.us.com]payday uk[/url] - askxzqsu
Posted by Online Loan at 2018-02-06 19:33:24get cash now payday loans no credit check cash lenders [url=https://cashloans.us.com]need money now[/url] - mfeuddin
Posted by A Payday Loan at 2018-02-06 12:07:29personal loans online personal loans online unsecured personal loans [url=https://personalloansonline.us.org]very bad credit personal loans[/url] - qkfpitms
Posted by Direct Lenders at 2018-02-06 11:26:54online loan loans for christmas specialized loan services [url=https://onlineloan.us.com]loans fast[/url] - cylqmmsl
Posted by Loans at 2018-02-06 07:07:38personal loans with bad credit loans for bad credit i need a loan now [url=https://loansforbadcredit.us.org]loans with bad credit[/url] - gtnkncgb
Posted by aarp car insurance at 2018-02-06 04:44:43insurance auto quotes auto insurance quotes car insurance quotes [url=https://autoinsurancequotes.us.org]auto insurance quotes[/url] - rvodjrwr
Posted by JamesRed at 2018-02-06 04:29:44buy essays college essays buy essays online [url=https://buyessays.stream]buy a essay[/url] free sex chat free naked webcam sex chat [url=https://chatsex.bid]sex chat[/url] write my paper homework help live chat write a paper [url=https://writeapaper.stream]secondary school homework help[/url] payday loans direct lenders best payday loans payday bad credit loan [url=https://paydaybadcreditloan.bid]direct payday lenders online[/url] easy payday loans online same day payday loans online same day payday loans online [url=https://samedaypaydayloansonline.bid]easy payday loans online[/url] best online loans the best online payday loans best payday loans online [url=https://thebestonlinepaydayloans.trade]online payday loans[/url] essay writing help homework math essay writing [url=https://essaywriting.trade]writing my essay[/url] chat girl cam girl chat video [url=https://chatsex.trade]chat sex[/url] research paper on abortion best essay writing service writing my essay [url=https://bestessaywritingservice.science]literature review writing[/url] - ithhhicn
Posted by Define Assignments at 2018-02-06 04:09:37write my paper best pay for essay writing services write my paper [url=https://writemypaper.us.com]write my custom paper[/url] - jmzhmcbl
Posted by Essay Writing Tip at 2018-02-06 03:31:06paper writing service fast essay writing service assignment writers [url=https://paperwritingservice.us.com]paper writing service[/url] - aewgvoss
Posted by Loans at 2018-02-05 23:17:37microloan program payday loans online payday loans online [url=https://loansonline.us.com]loans online[/url] - xsvrjfyk
Posted by allstate insurance at 2018-02-05 22:11:06progressive motorcycle insurance auto insurance quote car insurance quote online [url=https://autoinsurancequote.us.com]auto insurance quote[/url] - nbaltqdb
Posted by Easy Payday Loan at 2018-02-05 20:03:10same day payday loans no credit check loan consolidation companies loans instant approval [url=https://loansinstantapproval.us.com]loans instant approval[/url] - qcfrfhbr
Posted by Buy Essay Cheap at 2018-02-05 19:54:50essay writing college essay harvard college essay writing [url=https://essaywriting.us.com]cheap essay writing[/url] - nvoymcsb
Posted by Loan at 2018-02-05 16:46:59payday loans online bank loans personal payday loans online no credit check [url=https://paydayloansonline.us.org]payday loans online[/url] - bidewhfb
Posted by Payday Loans Online at 2018-02-05 11:50:51quick personal loans online guaranteed approval payday loans installment loans [url=https://installmentloans.us.com]installment loans online[/url] - joqnddxz
Posted by Online Loans at 2018-02-05 08:24:11payday loan no fax payday loans no fax faxless payday loans [url=https://paydayloan.us.org]faxless payday loans[/url] - ccxcdkhv
Posted by insurance auto at 2018-02-05 04:41:10gap insurance for cars cheap auto insurance auto insurance companies in florida [url=https://cheapautoinsurance.us.org]compare car insurance[/url] - bkevidpk
Posted by Loans Online at 2018-02-04 21:50:45cash advance loans cash advance usa cash advance loan [url=https://cashadvanceloan.us.com]advance loan[/url] - gutjkzbv
Posted by allstate at 2018-02-04 21:28:14best auto insurance rates best auto insurance best car insurance [url=https://bestcarinsurance.us.com]top rated auto insurance companies[/url] - irzmrmgi
Posted by JamesRed at 2018-02-04 20:29:57wife on webcam camsluts wife on webcam [url=https://wifewebcam.cricket]wife webcam[/url] getting a loan money loan payday loan [url=https://moneyloan.trade]money loan[/url] payday loans quick loans cash loans [url=https://quickloans.trade]quick loans[/url] webcam dildo webcam sluts webcam masturbation [url=https://webcammasturbation.stream]webcam dildo[/url] payday loans no credit check payday loans no credit check payday loans bad credit [url=https://paydayloansnocreditcheck.webcam]installment loans no credit check[/url] easy payday loans loan cash quick loans [url=https://smallpaydayloans.bid]payday advance loans[/url] buy essays music essay college algebra homework help [url=https://buyessays.stream]buy essays[/url] - vewzfdev
Posted by Getting A Loan at 2018-02-04 18:57:15advance loan cash advance usa indian payday loans [url=https://cashadvanceloan.us.com]online payday advance[/url] - qyxkpzhn
Posted by Payday Loan at 2018-02-04 15:55:19payday loans no credit online payday loans no credit check payday loans no credit check [url=https://paydayloansonline.us.org]payday loans no credit check[/url] - lmtgzqhr
Posted by Write Essays For Me at 2018-02-04 15:51:45write an argumentative essay can you write an essay in one day argumentative essays [url=https://argumentessay.us.com]essay writing directions[/url] - yxgompgj
Posted by JamesRed at 2018-02-04 10:08:01fast payday loan fastest payday loan direct online lenders [url=https://fastestpaydayloan.stream]fastest payday loan[/url] direct lender payday loans online cash advance fast online payday loans [url=https://fastpaydayloans.cricket]easy fast payday loans[/url] essay writing math is fun homework help college papers [url=https://essaywriting.stream]paper writing[/url] online payday advance loan cash loans no credit check payday loans bad credit [url=https://onlinepaydayadvanceloan.stream]advance cash payday loan[/url] instant online payday loan easy online payday loans payday loans online [url=https://easyonlinepaydayloans.science]easy online payday loans[/url] buy essay college essay essay checker [url=https://scholarshipessay.science]essay checker[/url] direct lenders payday loans direct payday lenders online fast cash loans with no credit check [url=https://paydayloansdirectlenders.stream]payday loans direct lenders[/url] chat sex erotic sex chat cam sluts [url=https://sexchat.cricket]porn chats[/url] dissertation writing help on my math homework best essay writing service [url=https://bestessaywritingservice.cricket]essay writing[/url] xxx chatrooms milf show free sex cams [url=https://freecamporn.science]free porn shows[/url] - lwnfpenp
Posted by Loans For Bad Credit at 2018-02-04 01:24:15loans with bad credit guaranteed payday loans no credit check loans for bad credit with monthly payments [url=https://loansforbadcredit.us.org]loans with bad credit[/url] - gpcurdok
Posted by Essay Write at 2018-02-04 01:06:19essay writer essay writer essay editor [url=https://essaywriter.us.com]help for essay writing[/url] - aozcanih
Posted by JamesRed at 2018-02-04 00:32:54quick loans loans online get a loan [url=https://easyloans.webcam]best pay day loans[/url] small online payday loans the best online payday loans payday loans online [url=https://thebestonlinepaydayloans.trade]the best online payday loans[/url] essay writing writing my essay writing my essay [url=https://essaywriting.trade]writing my essay[/url] porn live webcam free adult cam chat free sex web chat [url=https://adultcamsites.trade]free sex cam chat[/url] advance payday loans loans online advance payday loans [url=https://advancepaydayloans.cricket]advance payday loans[/url] easy payday loans online best payday loans online online loans no credit check instant approval [url=https://easypaydayloansonline.science]best payday loans online[/url] loan easy payday loans getting a loan [url=https://moneyloan.trade]easiest payday loan to get[/url] free sex cam chat sex chat free live free sex chat [url=https://freesexcamchat.cricket]free sex video chat[/url] - uczfxtlv
Posted by Online Loan at 2018-02-03 23:05:48payday advances payday advance payday advances [url=https://paydayadvance.us.com]fast cash advance[/url] - isdvgidu
Posted by Payday at 2018-02-03 19:36:552000 payday loan cash advance loans cash advance loan [url=https://cashadvanceloan.us.com]cash advance loan[/url] - wikxcdkh
Posted by Best Online Loans at 2018-02-03 18:00:05debt consolidation loans instant approval loans instant approval [url=https://loansinstantapproval.us.com]quick loans for people with bad credit[/url] - wthozqin
Posted by Homework Good Or Bad at 2018-02-03 15:23:07essays websites essay writer writing a basic essay [url=https://essaywriter.us.com]college essays why this college[/url] - geqwzsci
Posted by JamesRed at 2018-02-03 14:29:30quick loans quick loans quick loans [url=https://quickloans.cricket]quick loans[/url] payday loans lenders quick loans 100 approval online payday lenders [url=https://paydayloanslenders.stream]online payday lenders[/url] short term loans direct lenders short term loans direct lenders instant online loans [url=https://shorttermloansdirectlenders.webcam]small payday loans[/url] - cfdvkeim
Posted by Best Payday Loan at 2018-02-03 14:14:22payday loan quick loans for bad credit hassle free payday loans [url=https://paydayloan.us.org]payday loan lenders only[/url] - vrbkidwa
Posted by Essay Writing at 2018-02-03 12:07:20write my research paper learning english essay writing essay research [url=https://researchessay.us.com]research essay[/url] - jngqcigw
Posted by JamesRed at 2018-02-03 06:51:37same day payday loans online best online payday loans pay day loans [url=https://samedayloans.cricket]pay day loans[/url] scholarship essay scholarship essay assignment help in sydney [url=https://scholarshipessay.science]custom essay writing service[/url] free webcam porn free webcam porn free online porn chat [url=https://freewebcamporn.bid]sex chat free[/url] - hjchrdrx
Posted by JamesRed at 2018-02-03 02:50:03paper writing essay writer paper writing [url=https://paperwriting.webcam]can someone do my assignment[/url] best payday loan online no credit check payday loan paydayloan [url=https://bestpaydayloan.stream]best payday loan[/url] online payday loans for bad credit online payday loan instant approval online payday loan instant approval [url=https://onlinepaydayloaninstantapproval.loan]guaranteed payday loans[/url] research writing research report marketing homework help [url=https://researchwriting.webcam]buy term papers online[/url] - buapiexq
Posted by Homework Now.Com at 2018-02-03 02:29:02essay writer essay helper essay typer [url=https://essaywriter.us.com]essay editor[/url] - pcwxzfiu
Posted by JamesRed at 2018-02-03 01:35:41free porn cams free porn cams live cams [url=https://liveporncams.webcam]live cams[/url] mature cams amateur webcam girls slut chat [url=https://hotwebcamgirls.science]webcam amateur[/url] online payday advance loan payday advance loan payday advance loan [url=https://onlinepaydayadvanceloan.stream]instant online payday loan[/url] assignment help uk pay for essay writing uk best homework help websites [url=https://buyessayonline.stream]buy essay now[/url] quick loans loans quick loans [url=https://quickloans.cricket]quick loan[/url] pay day loans same day loan pay day loans [url=https://samedayloans.cricket]same day loans[/url] direct payday lenders online easy loans payday loans online direct lenders [url=https://onlinepaydayloansdirectlenders.science]payday loans direct lenders[/url] online payday loans for bad credit payday loans online direct lender payday loans bad credit [url=https://onlinepaydayloansforbadcredit.bid]check into cash[/url] online payday loan application online payday loan application online payday loan application [url=https://onlinepaydayloanapplication.science]online payday loan application[/url] successful college essay writing my essay best essay writing service [url=https://bestessaywritingservice.cricket]homework helper[/url] - xytvvfrs
Posted by Write Essay For Me at 2018-02-02 23:44:57mastering chemistry homework help homework help homework help [url=https://homeworkhelp.us.com]homework help[/url] - encbchih
Posted by Speedycash at 2018-02-02 22:07:37loans instant approval online quick loans payday loans no credit [url=https://loansinstantapproval.us.com]online payday loans instant approval[/url] - whjutmxk
Posted by Payday Express at 2018-02-02 21:12:03get cash now personal loans no credit check loans no credit check [url=https://loansnocreditcheck.us.com]fast no credit check loans[/url] - qnxspfmi
Posted by Payday Loan at 2018-02-02 17:30:51online loans for bad credit loans for bad credit fax payday loan [url=https://loansforbadcredit.us.org]personal loans quick[/url] - mplzbveb
Posted by Best Payday Loan at 2018-02-02 14:23:32payday advance payday advance cashloans [url=https://paydayadvance.us.com]free loans no credit check[/url] - mtthnlgb
Posted by Loan at 2018-02-02 14:16:38loan site online loan loan site [url=https://onlineloan.us.com]online loan[/url] - onkgdupy
Posted by Random Assignments at 2018-02-02 03:28:23essay writing about internet write essays for me essays [url=https://essays.us.com]write a essay online[/url] - kdqxzvdv
Posted by JamesRed at 2018-02-01 21:16:25online payday advance loan loan cash online payday advance loan [url=https://cashadvanceloan.bid]cash advance loan[/url] same day payday loans online same day payday loans online direct lenders online loans [url=https://samedaypaydayloansonline.bid]online payday lenders[/url] best payday loan payday cash advance loan payday loan direct lenders [url=https://directpaydayloanlenders.webcam]payday loan direct lenders[/url] - inilrujb
Posted by Write Assignment at 2018-02-01 18:39:46write my paper for me write my paper custom paper [url=https://writemypaper.us.com]help me write my paper[/url] - mvsifzie
Posted by Payday at 2018-02-01 16:43:00loans no credit check free loans loans no credit check [url=https://loansnocreditcheck.us.com]money loans no credit check[/url] - cwrjgxlc
Posted by Loan at 2018-02-01 15:13:18advance payday payday advances payday advance [url=https://paydayadvance.us.com]loan company[/url] - hmzcpikl
Posted by French Homework at 2018-02-01 11:50:31writing an argumentative essay things to write persuasive essays on write an argumentative essay [url=https://argumentessay.us.com]argumentative essays[/url] - dmmnohxg
Posted by Direct Lender Loans at 2018-02-01 10:58:01payday loans online payday loans no credit check same day payday loans no credit check same day [url=https://paydayloansonline.us.org]loans in ohio[/url] - xckfaott
Posted by Payday Loans at 2018-02-01 10:39:19payday loans 100 approved bad credit personal loans personal loans [url=https://personalloans.us.org]personal loans[/url] - uqlcgadd
Posted by Writer Essay at 2018-02-01 01:19:11college homework help help with homework homework help [url=https://homeworkhelp.us.com]homework help[/url] - hsetpwro
Posted by Payday Loans Online at 2018-01-31 23:46:39personal loans unsecured best personal loans best personal loans [url=https://personalloansonline.us.org]personal loans online[/url] - wyosilil
Posted by A Payday Loan at 2018-01-31 23:41:55get cash now payday loans new orleans cash loans no credit check [url=https://cashloans.us.com]need money now[/url] - jtqtbfvt
Posted by Quick Loans at 2018-01-31 20:57:16money online payday loans nj cheap personal loans [url=https://personalloansonline.us.org]same day payday[/url] - letumchw
Posted by Assignments Help at 2018-01-31 19:45:08research essay write my research paper write my research paper [url=https://researchessay.us.com]research paper[/url] - dxbztfot
Posted by JamesRed at 2018-01-31 17:42:30payday loans bad credit best payday loan payday loan lenders [url=https://fastestpaydayloan.stream]fast payday loan[/url] free chat rooms amateur webcam girls erotic chat rooms [url=https://freechatrooms.bid]webcam room[/url] paid homework help abstract research paper good college essays [url=https://goodcollegeessays.science]good college essays[/url] cash advance loan cash advance loan cash advance lenders [url=https://cashadvanceloan.science]advance cash payday loan[/url] - ithkdefd
Posted by Online Loan at 2018-01-31 13:58:28express cash advance cash advance loan 5000 loan no credit check [url=https://cashadvanceloan.us.com]cash advance loan[/url] - brwyerwl
Posted by JamesRed at 2018-01-31 12:57:04best assignment help website essay helper write essay [url=https://essayprompts.cricket]essay prompts[/url] webcam dildo webcam sluts hot show porn [url=https://webcammasturbation.stream]webcam sluts[/url] payday loans for bad credit online payday advance loan payday loans for bad credit [url=https://paydayloansnocreditcheck.webcam]fast cash loans[/url] direct payday lenders online direct lenders online loans online installment loans [url=https://onlineloansdirectlenders.stream]direct lenders for bad credit[/url] bad credit payday loans direct lenders bad credit payday loans direct lenders bad credit payday loans direct lenders [url=https://badcreditpaydayloansdirectlenders.cricket]bad credit payday loans direct lenders[/url] writing a personal essay for college writing research papers illustration essay [url=https://illustrationessay.trade]essay help[/url] swinger cams cam sites cam sites [url=https://camsites.cricket]cam sites[/url] karen dreams webcam cam sites web cam adult [url=https://adultcamsites.trade]adult webcams[/url] direct lender payday loans payday loans direct lender faxless payday loans [url=https://directlenderpaydayloans.cricket]payday loans online direct lender[/url] - zkvavusw
Posted by cheap insurance auto at 2018-01-31 07:47:35cheap auto insurance extremely cheap auto insurance cheap full coverage auto insurance [url=https://cheapautoinsurance.us.org]cheap auto insurance[/url] - xxoqvkui
Posted by Loans Online at 2018-01-31 07:44:23online loan online loan online loan [url=https://onlineloan.us.com]online loan[/url] - cugetlmb
Posted by Loan Cash at 2018-01-31 07:16:28personal loans online personal loans online same day payday [url=https://personalloansonline.us.org]personal loans unsecured[/url] - oznpsffk
Posted by Best Online Loans at 2018-01-31 06:15:44payday loans no credit check same day payday loans no credit check payday loans online no credit check [url=https://paydayloansonline.us.org]payday loans no credit check[/url] - sztzpyep
Posted by JamesRed at 2018-01-31 05:56:06sex chat free free adult chat free chat rooms [url=https://freechatrooms.bid]chatgirl[/url] online payday loans direct lenders direct lenders payday loans direct lenders online loans [url=https://onlinepaydayloansdirectlenders.science]online payday loans direct lenders[/url] free sexy webcams webcams porn free bbw webcams [url=https://freexxxwebcams.webcam]free bbw webcams[/url] payday lenders direct instant online payday loan online lenders [url=https://onlinepaydayloanlender.loan]online payday advance loan[/url] online fucking free webcam porn nude shows [url=https://freewebcamporn.bid]free webcam porn[/url] online payday loan application instant online payday loan online payday loan application [url=https://onlinepaydayloanapplication.science]payday loans online[/url] fast payday loans easy fast payday loans fast payday loans [url=https://fastpaydayloans.cricket]get a loan[/url] - orkcgogp
Posted by Payday Express at 2018-01-31 05:44:22easy money payday loans cash loans no credit check cash loans [url=https://cashloans.us.com]cash loans no credit check[/url] - qnqdcypt
Posted by JamesRed at 2018-01-31 05:23:24small payday loans small payday loans small online payday loans [url=https://smallpaydayloans.bid]internet payday loans[/url] getting a loan money loan money loan [url=https://moneyloan.trade]best payday loans online[/url] common application essay prompts common application essay prompts pay to do assignment [url=https://commonapplicationessayprompts.science]common application essay prompts[/url] government homework help research papers government homework help [url=https://schoolpapers.cricket]school papers[/url] online payday advance loan cash advance loan cash advance loan [url=https://cashadvanceloan.bid]cash advance loan[/url] sex chat room free sex chat cams free sex video chat [url=https://freesexcamchat.cricket]online sex cam[/url] writing essays for college writing essays for college solve my math [url=https://schoolpapers.trade]algebra homework help online[/url] buy essays online college essays trigonometry homework help [url=https://buyessays.stream]do my algebra homework for me[/url] - qcqbaega
Posted by insurance quote at 2018-01-31 05:10:28best car insurance get car insurance online best car insurance [url=https://bestcarinsurance.us.com]best car insurance[/url] - mmgaifgn
Posted by Pay To Do Homework at 2018-01-30 23:55:00essay writers college level essay transitions essay typer [url=https://essaywriter.us.com]teacher marked essays[/url] - jkezlkzr
Posted by Loans Online at 2018-01-30 22:19:44online loans bad credit instant approval loans instant approval signature loan [url=https://loansinstantapproval.us.com]payday loan without credit check[/url] - xqmkcgwp
Posted by Speedy Cash at 2018-01-30 22:10:26cash loans payday loan texas cash loans [url=https://cashloans.us.com]cash loans[/url] - bkeufmls
Posted by Cash Loan at 2018-01-30 18:49:00personal loan no credit check pay day board game unsecured personal loans for bad credit [url=https://loansnocreditcheck.us.com]personal loans no credit check[/url] - hnyghxvj
Posted by JamesRed at 2018-01-30 18:45:45essay homework help term paper writing essays help [url=https://researchpaperproposal.trade]research paper proposal[/url] same day payday loans online same day payday loans online payday loans for bad credit [url=https://samedaypaydayloansonline.bid]direct lenders of loans[/url] payday bad credit loan best payday loan bad credit payday loans [url=https://paydaybadcreditloan.bid]bad credit payday loans[/url] write my essay for me midlothian isd homework online i need help with my math homework [url=https://illustrationessay.trade]essay help[/url] easy loans best pay day loans easy loans [url=https://easyloans.webcam]easy loans[/url] write assignment for me common application essay prompts outlines for research papers [url=https://commonapplicationessayprompts.science]pay to do my assignment[/url] small payday loans small payday loans best payday loans [url=https://smallpaydayloans.bid]small payday loans[/url] money loan money loan loan [url=https://moneyloan.trade]payday loan lenders[/url] - mxadxawz
Posted by Buy Cheap Essay at 2018-01-30 17:59:48writing an argumentative essay argument essay argument essay [url=https://argumentessay.us.com]buying essays online safe[/url] - ubwudnbq
Posted by Loan at 2018-01-30 11:42:20payday advance advance payday loan unsecured loans with bad credit [url=https://paydayadvance.us.com]payday advance[/url] - rxbsgwoi
Posted by Payday Loan at 2018-01-30 11:32:13payday advance payday advances payday advance [url=https://paydayadvance.us.com]payday advance[/url] - wedxzspw
Posted by JamesRed at 2018-01-30 04:23:00cash loans direct lender loans direct lenders payday loans [url=https://directlenderpaydayloans.cricket]payday loan direct lender[/url] paying someone to do your assignment woodland junior homework help write my paper for me [url=https://writeapaper.stream]write my paper[/url] free chat rooms free sex video chat free online porn cams [url=https://freechatrooms.webcam]free chat rooms[/url] cash loans easy loans online loans no credit check instant approval [url=https://easyloans.webcam]easy loans[/url] online payday loan application bad credit payday loans direct lenders online loans no credit check instant approval [url=https://badcreditpaydayloansdirectlenders.cricket]internet payday loans[/url] literature review online research paper writers do my history homework [url=https://schoolpapers.cricket]research papers[/url] college essay writer website to help with math homework college essay help [url=https://collegeessaywriter.bid]medical school essays[/url] payday loans for bad credit bad credit payday loans installment loan [url=https://paydayloansforbadcredit.stream]easy payday loans online[/url] easy online payday loans easy online payday loans speedycash [url=https://easyonlinepaydayloans.bid]bad credit loans direct lenders[/url] easy payday loans online direct payday lenders no credit check loan [url=https://easypaydayloansonline.science]easy online payday loans[/url] - qblualhd
Posted by Loan at 2018-01-30 03:10:13need cash now cash loans direct lenders installment loans [url=https://cashloans.us.com]cash loans[/url] - xbpputoz
Posted by geico auto insurance at 2018-01-29 22:42:28auto insurance quote auto insurance quote car insurance quote [url=https://autoinsurancequote.us.com]car insurance quote[/url] - ikvdpqbb
Posted by Bad Credit at 2018-01-29 22:38:54bad credit loans loans for bad credit loans for bad credit [url=https://loansforbadcredit.us.org]loans for bad credit[/url] - xtmpebmc
Posted by amica auto insurance at 2018-01-29 21:12:32car insurance quote online car insurance quote auto insurance quote [url=https://autoinsurancequote.us.com]auto insurance quote[/url] - vufvakot
Posted by usaa car insurance at 2018-01-29 18:59:31auto insurance quotes online instant auto insurance quotes best auto insurance companies [url=https://autoinsurancequotes.us.org]car insurance quotes[/url] - zkfblpgp
Posted by Buy Essays Papers at 2018-01-29 18:05:54help writing a novel write my paper for me writing paper online [url=https://writemypaperforme.us.com]paper writer[/url] - fhacythj
Posted by Payday Loan at 2018-01-29 13:55:27personal loans personal loans for bad credit best payday loan lender [url=https://personalloans.us.org]personal loans with bad credit[/url] - irfqbguu
Posted by state auto insurance at 2018-01-29 13:00:23car insurance quote online auto insurance cheapest rates compare car insurance rates [url=https://autoinsurancequote.us.com]auto insurance quote[/url] - naduboot
Posted by allstate at 2018-01-29 05:56:13free auto insurance quotes freeway auto insurance auto insurance quotes online [url=https://autoinsurancequotes.us.org]car insurance estimate[/url] - jnrynmqi
Posted by Writing Essay Online at 2018-01-29 00:10:12writing essays essays essays [url=https://essays.us.com]essays my school[/url] - mtbmlxnf
Posted by Buy Custom Essay at 2018-01-28 23:16:16essay writer essay maker best college entrance essay [url=https://essaywriter.us.com]essay writer[/url] - gbgrdzfv
Posted by geico auto insurance at 2018-01-28 21:41:57auto insurance quote direct auto insurance auto insurance quote [url=https://autoinsurancequote.us.com]auto insurance quote[/url] - zegvbxht
Posted by Online Essay Writers at 2018-01-28 18:50:14homework help college homework help homework help [url=https://homeworkhelp.us.com]help with science homework[/url] - fglhiual
Posted by Speedycash at 2018-01-28 18:42:26get cash now personal loans application need money now [url=https://cashloans.us.com]cash loans[/url] - ipihpulu
Posted by JamesRed at 2018-01-28 14:16:35research report research papers research writing [url=https://researchwriting.stream]research writing[/url] direct lenders of loans online loans direct lenders payday loan no credit check [url=https://onlineloansdirectlenders.stream]online loans direct lenders[/url] bad credit payday loans direct lenders payday bad credit payday loans direct lenders [url=https://badcreditpaydayloansdirectlenders.cricket]fast payday loan[/url] get a loan quick loans bad credit loans direct lenders [url=https://quickloans.trade]quick loans[/url] cash advance loan bad credit cash advance loan [url=https://cashadvanceloan.bid]emergency loans no credit check[/url] direct payday loan lenders payday loan online direct payday loan lenders [url=https://directpaydayloanlenders.webcam]direct payday loan lenders[/url] erotic chat rooms free chat rooms free chat rooms [url=https://freechatrooms.webcam]free chat rooms[/url] - vqwdvgsq
Posted by Help My Essay at 2018-01-28 13:39:26writing essays essays essay writer hub [url=https://essays.us.com]essay writing expert[/url] - wdhsoyxs
Posted by JamesRed at 2018-01-28 13:07:58direct payday lenders online payday loans online direct lenders spotloan [url=https://paydayloansdirectlenders.stream]direct lenders payday loans[/url] online payday loan application online payday loan application best pay day loans [url=https://onlinepaydayloanapplication.science]loan[/url] writing a paper help in writing an essay writing a paper [url=https://paperwriting.webcam]paper writing[/url] argument essay essay writing science assignment help [url=https://criticalessay.trade]essay helper[/url] installment loans no credit check instant online loans instant payday loans [url=https://instantpaydayloans.webcam]online loans[/url] research essay research paper research essay [url=https://researchessay.cricket]library homework help[/url] same day payday loans online online payday advance loan small online payday loans [url=https://samedaypaydayloansonline.cricket]same day payday loans online[/url] - qllvereh
Posted by Buying Essays Online at 2018-01-28 11:52:00common application college essay essay japanese top essay writing websites [url=https://researchessay.us.com]rush essay[/url] - kqdpeqvz
Posted by Cash Advance at 2018-01-28 11:47:25hassle free payday loans payday loan lenders payday loan [url=https://paydayloan.us.org]payday loan[/url] - zsdntbyr
Posted by Payday Loan at 2018-01-28 11:30:31payday loan check loans online payday loan [url=https://paydayloan.us.org]payday loan[/url] - chvqtffk
Posted by Online Lenders at 2018-01-28 09:36:26loans no credit check personal loans no credit check direct online payday loans [url=https://loansnocreditcheck.us.com]quick loans no credit check[/url] - gfqbqndz
Posted by aarp insurance auto at 2018-01-28 07:35:41insurance quotes auto auto insurance quotes online auto insurance quotes [url=https://autoinsurancequotes.us.org]best car insurance for young drivers[/url] - bninntsq
Posted by JamesRed at 2018-01-28 07:23:35psychology homework help essay writing statistics homework helper [url=https://essaywriting.trade]buy papers[/url] payday loan no credit check best online payday loans quick loans [url=https://quickloans.science]cash loans[/url] free webcam sex chat free sex webcam free webcam sex chat [url=https://freewebcamsex.stream]free sex webcam[/url] porn webcams nude show free adult cam to cam [url=https://adultcamsites.trade]free adult webcam chat[/url] spotloan best payday loans online online payday loans instant approval [url=https://easypaydayloansonline.science]easy online payday loans[/url] online payday loans for bad credit instant online payday loan cash advance lenders [url=https://cashadvancelenders.trade]cash advance lenders[/url] - hdvzffvl
Posted by Define Assignments at 2018-01-28 05:00:03admission essay writing service help me to write a book business writing [url=https://writemypaper.us.com]write a paper for me[/url] - chauatdh
Posted by Fastest Payday Loan at 2018-01-28 04:49:04unsecured payday loan faxless payday loans [url=https://paydayloan.us.org]payday loan[/url] - xmnkfqjb
Posted by JamesRed at 2018-01-28 04:39:37live free sex chat fuck show free porn show [url=https://cfnmshow.cricket]chat porn[/url] fastest payday loan fastest payday loan payday advance loan [url=https://fastestpaydayloan.stream]same day loan[/url] free xxx webcams free webcams free xxx webcams [url=https://freexxxwebcams.webcam]porn webcams[/url] payday loan direct lenders easy payday loan fastest payday loan [url=https://fastestpaydayloan.bid]quick loans 100 approval[/url] - rcjhmteb
Posted by Bad Credit at 2018-01-27 20:28:44online loan online loan specialized loan services [url=https://onlineloan.us.com]online loan[/url] - prwnbdum
Posted by JamesRed at 2018-01-27 15:58:07north schuylkill homework helpline research writing research report [url=https://researchwriting.webcam]research writing[/url] free sexy webcams free adult webcam chat chat with sluts [url=https://freeadultwebcamchat.science]free sex webcam chat[/url] best payday loan best payday loan best payday loan online [url=https://bestpaydayloan.stream]best pay day loans[/url] scholarship essay write essay argumentative essay [url=https://scholarshipessay.science]scholarship essay[/url] - dgguogwz
Posted by Personal Loans at 2018-01-27 15:04:51loan service payday loans in houston texas loan online [url=https://onlineloan.us.com]loan application[/url] - eeafwboh
Posted by Speedy Cash at 2018-01-27 12:40:06installment loans installment loans installment loans [url=https://installmentloans.us.com]installment loans[/url] - mbdytqsm
Posted by Pay Day Loans at 2018-01-27 10:21:37bad credit personal loans guaranteed approval personal loans personal loans for bad credit [url=https://personalloans.us.org]personal loans no credit[/url] - eliixgjc
Posted by JamesRed at 2018-01-27 05:39:58same day payday loans online guaranteed payday loans same day loan [url=https://samedayloans.cricket]money loan[/url] online payday loans direct lenders payday loans lenders payday loans direct lenders only [url=https://onlinepaydayloansdirectlenders.science]payday loans direct lenders[/url] college essay help good college essays good college essays [url=https://goodcollegeessays.science]good college essays[/url] cash advance loan cash advance loan loan cash [url=https://cashadvanceloan.science]cash advance lenders[/url] good chat rooms sex web cam porn live chat [url=https://freewebcamporn.bid]cam sluts[/url] free sex webcam chat webcam amateur free adult webcam chat [url=https://freeadultwebcamchat.science]free adult webcam chat[/url] web cam adult free web cam porn free web cam porn [url=https://freecamporn.science]nude shows[/url] advance payday loans online quick loan online payday advance loan [url=https://onlinepaydayadvanceloan.stream]payday advance online[/url] speedy cash payday loans online direct lender loans online payday loan application [url=https://onlinepaydayloanapplication.science]fast cash loans with no credit check[/url] best payday loan best payday loan online payday cash advances [url=https://bestpaydayloan.stream]payday advance no credit check[/url] - lhhxwliw
Posted by Online Loan at 2018-01-27 03:28:36no credit check payday loans online payday loans no credit check cash loans with monthly payments [url=https://paydayloansonline.us.org]payday instant loans[/url] - lpoqhfew
Posted by JamesRed at 2018-01-26 21:59:24database assignment help research paper proposal research paper proposal [url=https://researchpaperproposal.trade]do my paper[/url] payday advance loan online payday loans advance payday loans [url=https://advancepaydayloans.cricket]advance payday loans[/url] bad credit payday loans direct lenders cash advance payday loan payday advance no credit check [url=https://badcreditpaydayloansdirectlenders.cricket]pay day loan[/url] loan cash quick loans 100 approval quick loans 100 approval [url=https://quickloans100approval.stream]quick loans 100 approval[/url] can someone do my assignment please do my homework college paper [url=https://collegepaper.trade]term paper[/url] payday advance loan cash advance lenders loans online [url=https://cashadvanceloan.bid]easy cash payday loan[/url] best payday loans online easy payday loans online easy payday loans online [url=https://easypaydayloansonline.science]best payday loans online[/url] payday faxless fast cash loan same day payday loans online emergency loan no credit check [url=https://samedaypaydayloansonline.bid]getting a loan[/url] - vumwzlrs
Posted by Direct Lender Loans at 2018-01-26 18:24:04loans in columbus ohio personal loan no credit check loans bad credit [url=https://loansnocreditcheck.us.com]guaranteed payday loan approval[/url] - ctekgpzd
Posted by JamesRed at 2018-01-26 16:25:37adult chats free erotic chat free adult chat [url=https://freechatrooms.webcam]free erotic chat[/url] easy payday loans online best payday loans online online payday loan lender [url=https://easypaydayloansonline.science]easy online payday loans[/url] free sex webcam free webcam sex cam sites [url=https://freewebcamsex.stream]free sex webcam[/url] loans online small loans no credit check payday loans lenders [url=https://guaranteedpaydayloans.webcam]guaranteed payday loans[/url] free sex cam chat free sex cam chat free sex cam chat [url=https://freesexcamchat.cricket]webcam asian[/url] quick loans loans quick loans [url=https://quickloans.science]quick loan[/url] essay writing service college essays i need someone to do my homework [url=https://collegeessayprompts.trade]college essay help[/url] - rhltkhzu
Posted by JaneRed at 2018-01-26 14:12:29cash lenders loans in austin need cash now [url=https://cashloans.us.com]cash loans no credit check[/url] - sivzejbp
Posted by Direct Lender Loans at 2018-01-26 14:02:36instant cash loan installment loan loans in texas [url=https://installmentloans.us.com]installment loans[/url] - rmjmtvtk
Posted by Personal Loans at 2018-01-26 12:40:35faxless payday loans faxless payday loan no faxing payday loan [url=https://paydayloan.us.org]credit loan application[/url] - iispfwwe
Posted by Payday Loans Online at 2018-01-26 03:34:32payday loans online no credit check no credit check payday loans instant approval payday loans online [url=https://paydayloansonline.us.org]payday loans online[/url] - klylnrxh
Posted by Money Loan at 2018-01-26 00:17:38fast online loan loans for bad credit bad credit short term loans [url=https://loansforbadcredit.us.org]bad credit lenders[/url] - xsdxxbtp
Posted by JamesRed at 2018-01-25 23:25:01payday loans bad credit no credit check emergency loans payday loans for bad credit [url=https://paydaybadcreditloan.bid]bad credit payday loans[/url] english homework helper common application essay prompts help write essay [url=https://commonapplicationessayprompts.science]pay to write research paper[/url] research essay essay writing websites la homework help [url=https://researchpaperproposal.trade]do my paper[/url] school papers college accounting homework help research papers [url=https://schoolpapers.cricket]law school essays[/url] webcam dildo webcam masturbation webcam sluts [url=https://webcammasturbation.stream]webcam masturbation[/url] guaranteed payday loans guaranteed payday loans payday cash advance loan [url=https://guaranteedpaydayloans.webcam]guaranteed payday loans[/url] adult cam webcam porn sites adult cam sites [url=https://adultcamsites.trade]cam live porn[/url] cash loan advance online payday loan lenders online payday loans direct lenders [url=https://badcreditpaydayloansdirectlenders.cricket]getting a loan[/url] term paper term paper write a paper [url=https://writeapaper.stream]write a paper[/url] payday loans online loans with no credit check payday cash advance loan [url=https://quickloans100approval.stream]payday loan no credit check[/url] - ghrcqyoj
Posted by Writing Online at 2018-01-25 21:43:04essays easy essay outline 5 paragraph essay writing [url=https://essays.us.com]help me write my essay[/url] - elchnkyl
Posted by JamesRed at 2018-01-25 12:17:07direct lenders online loans payday loans online direct lender payday loans online direct lender [url=https://directlenderpaydayloans.cricket]fast cash loans[/url] cash loans loans online easy loans [url=https://easyloans.webcam]payday loan direct lender[/url] buy essay online assignments help buy essay online [url=https://buyessayonline.cricket]buy essay online[/url] research essay research essay research essay [url=https://researchessay.bid]research papers[/url] - jwwixqlo
Posted by Fastest Payday Loan at 2018-01-25 10:15:32installment loans for bad credit installment loans no credit check tax loan advance [url=https://installmentloans.us.com]5000 loans[/url] - kkungxxk
Posted by Online Homework at 2018-01-25 07:09:11student assignment write my custom paper writing paper online [url=https://writemypaper.us.com]creative writers[/url] - tggwboft
Posted by Essay Writer Reviews at 2018-01-25 06:10:20writing my paper write my paper write my paper for me [url=https://writemypaper.us.com]writing assistance[/url] - ugvugjjv
Posted by Paper Writer Free at 2018-01-25 04:26:15essay essays quotes used in essay writing need help with writing an essay [url=https://essays.us.com]help me write my essay[/url] - fctoliga
Posted by Assignment Define at 2018-01-25 02:54:38essay writing tests college essay art essays [url=https://essays.us.com]essays[/url] - jnxldgdg
Posted by Essay Writing Tip at 2018-01-25 01:44:31term papers term paper term paper help [url=https://termpaper.us.com]law term paper[/url] - dquyiqqv
Posted by Define Assignments at 2018-01-24 21:02:49essay writer essay writer essay maker [url=https://essaywriter.us.com]essays 123[/url] - jtynelrv
Posted by Bad Credit at 2018-01-24 20:23:57personal loan online cash loans wells fargo student loan [url=https://cashloans.us.com]get a loan with bad credit[/url] - gmqnmvsn
Posted by Online Essays at 2018-01-24 18:54:15essays online essays write essay for me [url=https://essays.us.com]write essay for me[/url] - nktnwlku
Posted by My Paper Writer at 2018-01-24 18:20:01essay writing services best custom essay writing service essay writing service [url=https://essaywritingservices.us.org]essay writing services[/url] - qvwwmkgg
Posted by Define Assignations at 2018-01-24 18:09:17write college papers for money essay writing service online paper writing service [url=https://essaywritingservices.us.org]editing service[/url] - mnajawqg
Posted by Cash Loan at 2018-01-24 12:32:28advance payday payday advance paydayloan com [url=https://paydayadvance.us.com]payday advance[/url] - dyuqvucd
Posted by Third Grade Homework at 2018-01-24 06:28:05i need someone to write a paper for me write my paper for me best online essay writing services [url=https://writemypaperforme.us.com]write my paper for me[/url] - nopocsnn
Posted by Write Essay Service at 2018-01-24 02:23:572 page custom essay under 20 write me an essay essays online [url=https://essays.us.com]essays[/url] - dmnextao
Posted by Online Payday Loan at 2018-01-24 01:08:29payday loan faxless payday loans no fax payday loans [url=https://paydayloan.us.org]payday loan no fax[/url] - odtxnsms
Posted by Online Essay Writer at 2018-01-23 16:59:03term paper term paper term paper [url=https://termpaper.us.com]paper term[/url] - jeehpety
Posted by Paydayloan at 2018-01-23 12:23:00payday loans no credit check same day no credit check payday loans instant approval debt consolidation loans for fair credit [url=https://paydayloansonline.us.org]5000 loan no credit check[/url] - ivjspktk
Posted by Write My Essay Cheap at 2018-01-23 11:18:53write a term paper term paper writer term paper writer [url=https://termpaper.us.com]term paper[/url] - nbfoinbb
Posted by Writing My Essay at 2018-01-23 07:17:20write essay for me essays online essay writers [url=https://essays.us.com]essays[/url] - lkcwmxmv
Posted by Random Assignments at 2018-01-23 03:27:12write papers for me write my paper for me writing paper [url=https://writemypaperforme.us.com]write my paper for me[/url] - lomitqco
Posted by Quick Loans at 2018-01-22 23:56:56online payday advance cash advance loan cash advance loan [url=https://cashadvanceloan.us.com]advance loan[/url] - jzyhrskd
Posted by Buy College Essays at 2018-01-22 22:42:40essay maker essay writer essay writer [url=https://essaywriter.us.com]college essays community[/url] - mhuuuthe
Posted by Paydayloan at 2018-01-22 22:29:19legit payday loans online payday loans in houston texas specialized loan services [url=https://onlineloan.us.com]pay day cash advance[/url] - irldvmry
Posted by Buy Essay Cheap at 2018-01-22 19:38:11writing college application essays write essay for me essays online [url=https://essays.us.com]learning to write essays[/url] - zxwwnkbg
Posted by Loans For Bad Credit at 2018-01-22 17:13:27best online loans instant approval cash in minutes loans online [url=https://loansonline.us.com]loans online[/url] - snrnapxh
Posted by JamesRed at 2018-01-22 16:48:11small payday loans cash payday loans online fast payday loans [url=https://internetpaydayloans.stream]internet payday loans[/url] free adult webcam chat free adult video chat free sex webcam chat [url=https://freeadultwebcamchat.science]sex chat online[/url] quick cash loan best cash loan small payday loans [url=https://smallpaydayloans.cricket]payday advance loans[/url] live webcam porn live cams adultchat [url=https://liveporncams.webcam]live webcam porn[/url] free erotic chat free chat rooms sex chat free [url=https://freechatrooms.bid]free chat rooms[/url] online payday loan application online payday loan application no credit check loan [url=https://onlinepaydayloanapplication.science]online payday loan application[/url] - eokomwun
Posted by Buy Cheap Essay at 2018-01-22 14:36:20essay writer essay typer essay writing skill [url=https://essaywriter.us.com]essay writers[/url] - bqlmpjqg
Posted by Quick Loan at 2018-01-22 13:03:511 hour loan instant payday loan no credit check cash loan advance [url=https://paydayloan.us.org]payday loan[/url] - axlvpvbw
Posted by Online Essay Help at 2018-01-22 08:22:48college homework homework help homework for me [url=https://homeworkhelp.us.com]help with my homework[/url] - bekxxkkk
Posted by Loans For Bad Credit at 2018-01-22 07:03:25specialized loan services loan application online loan [url=http://onlineloan.us.com]loan lenders for bad credit[/url] - oxoypvzs
Posted by Payday Express at 2018-01-22 05:49:22personal loans loans personal personal loans for poor credit [url=https://personalloans.us.org]personal loans for poor credit[/url] - ulnoffmk
Posted by Buy Papers Online at 2018-01-22 04:05:37argument essay argumentative essays argumentative essay [url=https://argumentessay.us.com]english 102 essays help[/url] - jzagevav
Posted by Fastest Payday Loan at 2018-01-22 03:23:02discover personal loans online loan lendingtree [url=https://onlineloan.us.com]online loan application[/url] - pvqizpph
Posted by Direct Lender Loans at 2018-01-21 19:17:26payday loans no credit check loan application status payday loans no credit check same day [url=https://paydayloansonline.us.org]nevada payday loans[/url] - mhlaciti
Posted by Paper Writer Free at 2018-01-21 17:26:05quotations on essay my last day at college essays leadership college essays [url=https://essays.us.com]essays[/url] - pwrxfpay
Posted by Pay Day Loan at 2018-01-21 14:40:35installment loans installment loan installment loans no credit [url=https://installmentloans.us.com]installment loans no credit check[/url] - hyqtgndk
Posted by Payday Loan Online at 2018-01-21 08:23:32cash advance no credit check personal loans no credit no credit check payday loans online [url=https://personalloans.us.org]small loans[/url] - uqayfnpr
Posted by Personal Loans at 2018-01-21 06:26:06payday loans online payday loans online no credit check payday loans [url=https://paydayloansonline.us.org]no credit check payday loans[/url] - vkspsopy
Posted by Online Lenders at 2018-01-21 03:44:18fast cash advance payday loans no brokers payday advance [url=https://paydayadvance.us.com]advance payday loan[/url] - enjbqhvl
Posted by Buy Essays Papers at 2018-01-20 22:29:02best essay writing service reviews write my paper for me writing articles for money online [url=https://writemypaperforme.us.com]custom essay writing service reviews[/url] - cwdpnjit
Posted by Write My Paper at 2018-01-20 15:34:52paper writing services editing service college paper writing service [url=https://paperwritingservice.us.com]paper writing service[/url] - vtjugclt
Posted by Homework Center at 2018-01-20 14:29:27paper writing service college paper writing argumentative paper [url=https://paperwritingservice.us.com]paper writing service[/url] - vxfyopzw
Posted by Assignment Helper at 2018-01-20 10:09:37write a research paper research essay research essay [url=https://researchessay.us.com]research essay[/url] - sldxngfw
Posted by Paydayloan at 2018-01-20 08:07:37loans no credit check cash advance loans direct lender loans no credit check [url=https://loansnocreditcheck.us.com]money loans no credit check[/url] - teifsmro
Posted by Best Online Loans at 2018-01-20 07:23:20best debt consolidation loan loans with bad credit advance payday loan [url=https://paydayadvance.us.com]emergency payday loans[/url] - gyiqvdbs
Posted by Online Loans at 2018-01-20 06:53:26express cash advance advance cash cash advance loans [url=https://cashadvanceloan.us.com]advance cash[/url] - cpdspxam
Posted by Assignment Helpers at 2018-01-20 03:35:34essay writing essay writing essay writing [url=https://essaywriting.us.com]essay writing[/url] - qsjjnfky
Posted by Buy A Essay at 2018-01-19 22:42:00write my paper write my paper writing my paper [url=https://writemypaper.us.com]write my paper[/url] - riwnjawb
Posted by JamesRed at 2018-01-19 21:13:17college essay help dissertation service uk college essay help [url=https://collegeapplicationessay.bid]college application essay[/url] college essay helper essay writing assignment help experts [url=https://essaywriting.trade]essay writing[/url] college essay prompts dissertation writing uk college essays [url=https://collegeessayprompts.trade]college essay prompts[/url] - mudrhozx
Posted by Buy Essays Cheap at 2018-01-19 20:41:13research essay opening sentences for college essays writing law essays [url=https://researchessay.us.com]essay fixer online[/url] - wadcdwrx
Posted by Loans Online at 2018-01-19 13:51:48personal loans personal loans cash loan lenders [url=https://personalloans.us.org]personal loans bad credit[/url] - ddbcxrwm
Posted by Payday Express at 2018-01-19 13:19:16online loans for bad credit loans for bad credit payday loans cash advance [url=https://loansforbadcredit.us.org]unsecured loans for bad credit[/url] - gjsqpntp
Posted by Freedom Writer Essay at 2018-01-19 12:45:12help me write my paper write my paper for me help me write my paper [url=https://writemypaper.us.com]argument writing[/url] - cmcqlvhe
Posted by Loans Online at 2018-01-19 10:56:29loans for no credit payday loan payday loan [url=https://paydayloan.us.org]payday loan[/url] - yfuxzglj
Posted by Pay Day Loans at 2018-01-19 08:58:20personal loans no credit personal loans for poor credit personal loans for bad credit [url=https://personalloans.us.org]cash advance no credit check[/url] - logvofwd
Posted by JamesRed at 2018-01-19 06:03:54porn cams free sex cam chat free adult cam chat [url=https://freesexcamchat.cricket]free webcam sex chat[/url] webcam masturbation webcam dildo webcam masturbation [url=https://webcammasturbation.stream]webcam masturbation[/url] research paper proposal rose hulman homework help nursing assignment help australia [url=https://researchpaperproposal.trade]do my paper[/url] cash advance lenders payday advance online pay day lenders [url=https://cashadvancelenders.trade]quick loans no credit check[/url] payday loans lenders bad credit loans direct lenders no credit check payday loan [url=https://smallpaydayloans.bid]online loans direct lenders[/url] payday loans lenders online installment loans payday loans lenders [url=https://guaranteedpaydayloans.webcam]advance payday loans[/url] web cam adult free sex cam free adult web cam [url=https://adultcamsites.trade]free nude cams[/url] easy online payday loans direct lenders payday loans easy payday loans online [url=https://easypaydayloansonline.science]easy payday loans[/url] - crgqwtja
Posted by JamesRed at 2018-01-19 05:17:22payday loans online direct lender quick loans no credit check same day payday loans online [url=https://samedaypaydayloansonline.cricket]small online payday loans[/url] payday loans direct lenders payday lenders direct payday advance [url=https://paydayloansdirectlenders.stream]direct lender loans[/url] no credit check emergency loans payday loan payday loan [url=https://fastestpaydayloan.bid]a payday loan[/url] chat webcams free sex webcam chat free sex webcam chat [url=https://freeadultwebcamchat.science]free sex webcam chat[/url] research report research writing buy essay cheap [url=https://researchwriting.webcam]research report[/url] homework help school papers algebra help [url=https://schoolpapers.science]homework help[/url] payday loans on line payday loans online payday loans on line [url=https://smallpaydayloans.cricket]small payday loans[/url] speedy cash online lenders direct lenders of loans [url=https://loansonlinebadcredit.webcam]payday advance no credit check[/url] writing an effective research paper research paper on eating disorders buy essays online [url=https://goodcollegeessays.science]buy assignment[/url] sluts online one on one chat rooms free xxx webcams [url=https://hotwebcamgirls.science]hot webcam girls[/url] - pbyrbepv
Posted by Loans Online at 2018-01-19 04:55:26best online loans instant approval very bad credit payday loans payday loans online [url=https://loansonline.us.com]loans online[/url] - zxqngsfs
Posted by JamesRed at 2018-01-18 23:55:02illustration essay buy an essay illustration essay [url=https://illustrationessay.trade]essay help[/url] sex chat chat sex chat sex [url=https://chatsex.trade]chat sex[/url] essay paper need help with math homework essay prompts [url=https://essayprompts.cricket]essay prompts[/url] free adult cam chat adult cam sites cam sites [url=https://adultcamsites.trade]adult webcam sites[/url] - updyfgnz
Posted by Write Assignment at 2018-01-18 21:53:18write my paper college essay writing service writing paper online [url=https://writemypaper.us.com]write my papers[/url] - dzoscsad
Posted by Personal Loans at 2018-01-18 21:33:28loans online online personal loans loans online [url=https://loansonline.us.com]loans online[/url] - qcyxbazi
Posted by Online Payday Loans at 2018-01-18 17:41:21loans personal direct payday lenders bad credit personal loans [url=https://personalloans.us.org]bad credit personal loans guaranteed approval[/url] - xxzovjhp
Posted by Web Assign Utah at 2018-01-18 14:25:16writing an argumentative essay college essay writing essays in college [url=https://essaywriting.us.com]writing an essay[/url] - sbbsbhhm
Posted by Writing My Essay at 2018-01-18 13:21:25write an argumentative essay argument essay argumentative essays [url=https://argumentessay.us.com]writing a strong essay[/url] - zlzqvfrz
Posted by Get A Loan at 2018-01-18 13:13:04easy money payday loans personal loans with no credit cash payday advance [url=https://cashloans.us.com]dollar loan[/url] - whtdmazw
Posted by Pay Day Loan at 2018-01-18 12:40:20installment loans guaranteed installment loans no credit greenline loans [url=https://installmentloans.us.com]installment loans for bad credit[/url] - repvpjdt
Posted by Write My Paper at 2018-01-18 10:36:23write essays for me online essay writers write an essay about your school [url=https://essays.us.com]essays online[/url] - jrwuqmjc
Posted by Cash Loan at 2018-01-18 10:14:51loans arizona loan help now payday [url=https://paydayadvance.us.com]fast cash advance[/url] - cjzcubbb
Posted by JamesRed at 2018-01-18 09:18:28payday loans bad credit 10 top loan companies direct lenders direct payday loan lenders research essay research essay research paper heading mba essay research report research essay research papers online essay writing help college essay writers college essay help college essays assignment help in australia - vqxnkmmd
Posted by Quick Loans at 2018-01-18 08:19:071hr payday loans payday loan 1 hour loan debt consolidation with bad credit - hytipmwc
Posted by English Essay Writer at 2018-01-18 08:06:45critical thinking problem solving creative thinking problem solving write papers for me writing my paper - ofpvksip
Posted by Loans at 2018-01-18 03:56:10loans personal credit check bad credit personal loans online cash - bpssgtid
Posted by Easy Payday Loan at 2018-01-17 21:39:00loans for bad credit online loans for bad credit loans bad credit payday loans with no credit check - sehjpomm
Posted by Essay Writing at 2018-01-17 18:59:52term paper write a term paper buy custom term paper term paper - kjifjxtr
Posted by Buy Custom Essays at 2018-01-17 18:14:11words to use in essay writing writing my essay cheap essay writing writing my essay - gwrjfkwg
Posted by Instant Online Loans at 2018-01-17 10:16:54texas loan no fax payday loan fast loans hassle free payday loans - ikyiuyje
Posted by Quick Loans at 2018-01-17 07:24:08payday loan no fax payday loan no fax payday loan credit builder loan - odlmxmfj
Posted by JamesRed at 2018-01-17 05:04:37webcam sluts webcam dildo chat cam sex webcam masturbation online maths homework essay prompts person doing homework pay for dissertation free adult sex chat free sex cam chat free sex cam chat free sex cam chat - vihywwuf
Posted by Cash Loan at 2018-01-17 03:17:33express cash advance advance cash cash advance loans cash advance loan - ofowrorl
Posted by Instant Online Loans at 2018-01-17 01:48:56quick personal loans online installment loans installment loans bad credit installment loans guaranteed - yolboywc
Posted by Pay Day Loan at 2018-01-16 19:47:32payday loan faxless payday loan no faxing payday loan faxless payday loans - fmxnxpso
Posted by College Paper Writer at 2018-01-16 16:35:51argument essay argumentative essay argument essay https://argumentativeessay.us.com - homework help vikings - bblqcnpd
Posted by Cash Loan at 2018-01-16 13:45:25payday money payday loan 90 day payday loans loans for manufactured homes - rjsnbabe
Posted by Hire Essay Writer at 2018-01-16 12:21:22argumentative essays argumentative essay website that write essays for you argumentative essay - lzdkumrl
Posted by Write An Essay at 2018-01-16 09:01:55college essay essay essay writer https://essay.us.org - essay - tzfriqdm
Posted by Cash Loan at 2018-01-16 07:38:57cash advance loan advance loan check loans advance cash - zlvtrvyd
Posted by JaneRed at 2018-01-16 03:57:30essay writing argument essay essay essay - dxstdjoh
Posted by JamesRed at 2018-01-16 02:51:50college essay help college essay help college essay help websites that do your homework free chat rooms free chat rooms free sex chat erotic chat rooms web cams porn free sex chat chat sex sex chat college paper college admissions essay research paper do my algebra problem loan instant online payday loan instant online payday loan get a loan writing my essay writing my essay essay writing do my coursework the best online payday loans online payday loans fast online payday loans best online payday loans - csdsvmbo
Posted by Online Loan at 2018-01-16 01:42:37no interest loan online loans instant approval payday advance advance payday - zqkmthsy
Posted by Online Payday Loans at 2018-01-16 00:23:55tax advance loans faxless payday loan payday loan direct payday lenders bad credit - hvsprwxt
Posted by Google Essay Writer at 2018-01-15 23:50:31essay writing service homework help tvo need homework help writing my essay for me - vxeivmvk
Posted by Money Loan at 2018-01-15 18:54:25installment loans no credit check installment loans installment loans for bad credit installment loans online - runqznup
Posted by Payday at 2018-01-15 16:53:31payday loan finance finance faxless payday loans - aqaajehq
Posted by Cash Advance at 2018-01-15 09:49:29payday advance payday advance payday advance payday advances - evpavflt
Posted by Loans Online at 2018-01-15 09:48:03unsecured loans for bad credit loans with bad credit loans with bad credit small loans for bad credit - gecnemto
Posted by White Paper Writers at 2018-01-15 09:31:03research papers do my research paper research report research essay - pfczjzpm
Posted by JamesRed at 2018-01-15 07:45:50scholarship essay essay checker dissertation writing company need help with essay bad credit payday loans direct lenders online payday loans for bad credit bad credit payday loans direct lenders bad credit payday loans payday loans direct lenders direct lenders payday loans payday loans lenders payday loans lenders - yxavhnsr
Posted by Pay Day Loan at 2018-01-15 06:26:46cash loans no credit check need money now 100 loans direct loan servicing - gxtqyfmd
Posted by Online Payday Loan at 2018-01-15 00:53:14unsecured loans for bad credit bad credit loans personal loans with bad credit bad credit loans - kagvurdb
Posted by Pay Day Loan at 2018-01-15 00:23:14cash loans cash lenders cash loans cash loans - lomraggh
Posted by Online Loans at 2018-01-14 19:28:02no fax payday loans discover loans faxless payday loan no fax payday loan - nqdexgcv
Posted by Personal Loans at 2018-01-14 18:27:43fast cash loans online loans online direct easy cash loans online personal loans - anrzogxi
Posted by A Payday Loan at 2018-01-14 18:25:07installment loans need money today installment loans guaranteed 24 hour payday loans - rpwtjbka
Posted by Speedy Cash at 2018-01-14 18:24:05faxless payday loans payday loan payday loan faxless payday loans - eznpqbuu
Posted by Loans Online at 2018-01-14 12:02:34payday loans pennsylvania bad credit personal loans personal loans for bad credit personal loans for poor credit - imtmfxzg
Posted by JamesRed at 2018-01-14 11:55:38loans payday loans bad credit online installment loans same day payday loans online cash til payday loan cash advance loan bad credit cash advance loan small payday loans small payday loans advance payday loans no credit check payday loans instant approval easy loans easy loans easy payday loans online cash loans - csygnomv
Posted by Pay Day Loan at 2018-01-14 11:33:01loans online loans online loans online loans online - yajumrre
Posted by Payday Loans Online at 2018-01-14 05:52:34payday advance payday advance payday advance payday advance - iionpdmr
Posted by JamesRed at 2018-01-13 14:57:01cash loans no credit check getting a loan cash advance lenders online payday advance loan essay writer college essay writer writing a rationale for a research paper college essay writer essay writing service college essay prompts college essays essay writing service free sex webcam chat girl free webcam sex free webcam sex quick loans 100 approval online payday loans payday loans online quick loans 100 approval easy online payday loans best payday loans online easy payday loans online best payday loans online wife on webcam webcam slut wife webcam wife webcam chat sex sex chat chat sex web cam pussy - wublacxg
Posted by Homeworks Of America at 2018-01-13 12:02:04buy essays college essay help with essay writing college essays - kdwgmxnl
Posted by Personal Loans at 2018-01-13 09:13:25cash advance cash advance cash advance small online payday loans - dykdbmun
Posted by Spotloan at 2018-01-13 08:42:24payday payday loan payday cash loan payday - kyulnwhp
Posted by Custom Essay at 2018-01-13 05:15:19essay essay essay math homework help ontario - aonqevox
Posted by Term Paper Writers at 2018-01-13 01:22:20persuasive writing homework need help with assignment argumentative essay homework help vikings - zthlkdhx
Posted by Bad Credit at 2018-01-12 21:30:40advance cash payday loan cash advance loan payday advance online cash advance - dgsyhlit
Posted by insurance quotes at 2018-01-12 20:57:06car insurance aaa auto insurance quote compare auto insurance rates car insurance - scpgyvfm
Posted by Payday Express at 2018-01-12 17:57:17no credit check lenders only faxless payday loans loan get a loan - tzelnebv
Posted by Payday Express at 2018-01-12 16:01:16loan online loans cash loans fastest payday loan - tbkmldrb
Posted by Pay Day Loan at 2018-01-12 12:48:05loan loans payday loan loan - zwrcxvxi
Posted by A Payday Loan at 2018-01-12 11:36:44payday loan payday loans no credit check payday a payday loan - ollqcmdo
Posted by cheap car ins at 2018-01-12 07:43:47jupiter auto insurance auto insurance quotes california auto insurance quotes auto insurance company - weaedcnh
Posted by Bad Credit at 2018-01-12 06:05:58cash loan loans loan loan - bkuiropp
Posted by Direct Lender Loans at 2018-01-12 04:29:5515 minute loans direct lenders payday loans installment loans no credit check loan - xxafjtew
Posted by Speedy Cash at 2018-01-12 04:05:37loan get a loan loan payday loans online - agjuhzds
Posted by Buy A Essay at 2018-01-12 01:44:49college essay do my course chemical engineering homework help essay - papmxjsc
Posted by Online Loan at 2018-01-12 00:29:43loan loans easy approval payday loans online loans direct lenders - dwvijrdq
Posted by Speedycash at 2018-01-11 23:14:22no credit check payday loans instant approval payday loans online get a loan loan - izusczif
Posted by Write Essays For Me at 2018-01-11 22:17:10essay writing essay writing essay writing service essay writing service - bedpselg
Posted by car insurance rates at 2018-01-11 16:41:02compare auto insurance quotes compare car insurance rates cheap car insurance quotes compare car insurance - ailegxkz
Posted by Payday Loans at 2018-01-11 15:48:35payday a payday loan payday cash loan payday cash loan - kxjwcnkn
Posted by JamesRed at 2018-01-11 10:13:12small payday loans fast payday loans small payday loans direct lenders of loans essay writing essay writing essay writing essay writing service online payday loan instant approval online payday loan instant approval online payday loan instant approval payday advance writing an introduction for a research paper buy research papers no plagiarism romans homework help buying research paper help in writing an essay paper writing writing my paper economics assignment help bad credit payday loans direct lenders short term loans direct lenders loans online bad credit the best online payday loans argumentative essay essay helper argumentative essay critical essay college paper buy essay online buy essay online buy essays online free cam porn free porn shows free cam porn free porn shows free webcam sex free webcam porn chat sex free adult video chat - iqpfkifx
Posted by Term Paper Writer at 2018-01-11 03:54:46paper writing service essay writing service paper writing service paper writing service - pvftbuom
Posted by Pay Day Loan at 2018-01-11 02:12:05loans payday loan payday loans online loans online - wwrjoxvm
Posted by car insurance at 2018-01-11 01:19:49compare car insurance rates car insurance cheapest auto insurance compare auto insurance - hjmhsdyd
Posted by JamesRed at 2018-01-10 20:27:00online payday loans direct lenders quick cash loan short term loans direct lenders online payday loans direct lenders argument essay argument essay argument essay writing a personal essay for college chat sex webcam masturbation webcam sex chat sex chat writing a medical research paper school papers homework help number writing a medical research paper college essay help college essay help research paper abstract college essay help - dprfzppm
Posted by Best Payday Loan at 2018-01-10 20:15:28payday bad credit payday loans direct lenders payday advance online payday loans no credit check - afndtjur
Posted by Custom Essay Writer at 2018-01-10 19:22:52research paper research papers research papers https://researchpaper.us.com - research report - vcnjcizb
Posted by JamesRed at 2018-01-10 09:07:02easy loans easy loans cash loans easy online payday loans research writing research writing online essay writing research report short term loans direct lenders money loan money loan money loan sex free online live webcam porn free nude cams cam sites best payday loans online best payday loans online direct lenders for bad credit best payday loans college essay help school papers narrative essay help research papers quick loans 100 approval 10 top loan companies quick loans 100 approval best payday loans direct lenders online loans cash advance payday loan direct online lenders online loans direct lenders - nlltvgwk
Posted by insurance quote at 2018-01-10 05:24:37car insurance quotes in texas auto insurance quotes comparison list of car insurance companies auto insurance quotes online - prpmifrl
Posted by e insurance auto at 2018-01-10 02:50:17the general auto insurance quote compare auto insurance geico auto insurance quote car insurance - gehwzvcx
Posted by JamesRed at 2018-01-10 00:00:35faxless payday loan same day best payday loans online direct lenders no credit check best payday loans cam sites cam sites online fucking free live sex chat payday express same day payday loans online no credit check lenders only same day payday loans online online payday loans direct lenders loans bad credit payday loans payday loans bad credit cfnm show free chat rooms web cam pussy chat rooms - yvimdslc
Posted by Assignments Help at 2018-01-09 12:35:10research paper research paper research essay https://researchpaper.us.com - research papers - zmuuokye
Posted by My Homework Help at 2018-01-08 22:40:13college essays i need to do my homework solve my math https://collegeessays.us.com - college essay prompts - uqkjhbzl
Posted by Write Essay Service at 2018-01-08 15:51:40algebra homework help online i need to do homework essay https://essay.us.org - buying essays online - icoyntjz
Posted by Write My Thesis at 2018-01-08 13:04:51can t do my homework doing your homework essay cheap homework help vikings - pmrkwgse
Posted by Cash Advance at 2018-01-08 11:37:02easy approval payday loans payday cash loan payday loans no credit check easiest payday loan to get - czjevagl
Posted by A Payday Loan at 2018-01-08 08:58:16payday payday loans quick loan a payday loan - podieduj
Posted by Essay-writer.Org at 2018-01-08 07:43:14research paper on abortion paper writing service pay someone to do my assignment essay writing service - mhnrmgfb
Posted by White Paper Writers at 2018-01-08 05:09:45best dissertation writing service uk help with college essay compare and contrast essay help help me with my essay - xiwimdpj
Posted by Online Loans at 2018-01-08 00:03:28payday cash loan payday loans no credit check payday loan payday advance loan - jgketudk
Posted by Speedy Cash at 2018-01-07 16:07:47loan best payday loans online payday advance no credit check cash loans - guvvzmdw
Posted by English Essay Writer at 2018-01-06 18:57:24argumentative essay spss assignment help misd homework online argumentative essay - uxnrarli
Posted by Get A Loan at 2018-01-05 19:46:03loan loans online get a loan no credit check payday loans - okzucsmg
Posted by Pay Day Loans at 2018-01-05 15:37:08payday payday direct lender payday loans payday cash loan - uslffuil
Posted by Speedycash at 2018-01-05 14:05:5810 top loan companies loan loan loans online - pukljtal
Posted by Loans Online at 2018-01-05 03:41:54loan cash loan payday loans with no credit check loan - jteqjrhq
Posted by JamesRed at 2018-01-04 20:34:13college essays buy essays online german homework help buy essays sex chat free webcam sluts sex chat sex chat help with finance homework buy essay cost accounting homework help buy essay online do my paper do my paper help with math homework online paper writing service - iniecygp
Posted by JamesRed at 2018-01-04 14:17:32college essay help essay writer college essay writer essay writer essay prompts write essay outlines for research papers essay helper webcam sluts free adult sex chat cfnm show webcam masturbation research paper proposal homework help science do my paper term paper the best online payday loans no credit check loans online payday loans best online payday loans cam sites cam sites cam sites cam sites - nazkqyuo
Posted by Loan Cash at 2018-01-03 09:29:33payday loan near me loan loan payday loan - exkmarlm
Posted by best auto insurance at 2018-01-03 04:28:52car insurances compare car insurance compare car insurance cheapest auto insurance quotes comparison - cfnthucv
Posted by JaneRed at 2018-01-02 19:03:09personal loans with bad credit personal loans bad credit bad credit personal loans online bad credit personal loans - qojtlzap
Posted by accurate automotive at 2018-01-02 17:59:03compare car insurance quotes compare car insurance car insurance quotes comparison online auto insurance quotes comparison online - avagmwsn
Posted by PamRed at 2018-01-02 15:34:29online payday loan lender easy payday loans online payday loan lenders instant online payday loan school papers school papers math help online economic assignment help college essay help college essay help college essay help essays paying college athletes best payday loans online payday lenders direct paydayloan the best online payday loans - gobismal
Posted by cheap auto insurance at 2018-01-02 15:16:21the general car insurance autoowners insurance car insurance compare car insurance quotes - inlkboym
Posted by auto club insurance at 2018-01-02 03:11:27car insurance quotes car insurance quotes california online auto insurance quotes auto insurance quotes - efsxkbpt
Posted by PamRed at 2018-01-02 00:46:50payday loan online online payday loan application bad credit loans direct lenders quick cash loan my free web cam free web cam porn free sex webcam free sex webcam loans online bad credit pay day loans loans online bad credit loans online bad credit payday loans online direct lender same day payday loans online online payday loan application online payday loans direct lenders pay day loans same day loans online payday loan instant approval quick cash loans - jssftsud
Posted by PamRed at 2018-01-01 22:15:47paper writing writing my essay essay writing essay writing service payday faxless fast cash loan payday loans online direct lenders advance payday loans online cash payday loans online trig homework help good college essays good college essays college essays online payday loans for bad credit guaranteed payday loans bad credit payday loans online payday loans for bad credit online payday loan application pay day lenders installment loan direct lenders for bad credit college essay scholarship essay scholarship essay help writing a essay quick loan cash loans cash loans online cash advance school papers homework help school papers help with homework books fast payday loans online payday loans speedy cash payday loans online internet payday loans online payday loan online payday loans fastest payday loan 15 minute loans direct lenders - dyygynvj
Posted by Write College Essays at 2018-01-01 15:57:13essay writer essay argumentative essay argumentative essay - vpahyvas
Posted by Essay Buy at 2018-01-01 15:42:21geometry homework helper research paper research paper https://researchpaper.us.com - can you help me do my homework - gkzstxei
Posted by Essay Writing Tip at 2018-01-01 13:07:06college essay help college essay prompts dissertation editing help https://collegeessays.us.com - college essay prompts - adutyzeh
Posted by Personal Loans at 2018-01-01 10:09:30payday loans online loans online loans get a loan - vruhbxdr
Posted by My Homework Help at 2018-01-01 00:55:59i need homework help essay writing service essay writing high school essay - oyjmhyla
Posted by Payday Loan at 2017-12-31 16:25:44payday loans online direct lender loan payday loans online cash loan - ekuksxgl
Posted by Quick Loan at 2017-12-31 12:24:59cash advance cash advance loan cash online payday advance - ubtxevjs
Posted by Get A Loan at 2017-12-31 09:33:03cash advance payday loan best cash loan online payday advance cash advance - adpmwdqn
Posted by Payday Loans Online at 2017-12-31 08:15:37best cash advance loans online payday loan payday direct lenders no credit check - uoupqssy
Posted by A Payday Loan at 2017-12-31 03:10:55cash advance cash advance cash advance cash advance - dxkcrscj
Posted by Direct Lenders at 2017-12-30 14:28:47payday loans with no credit check emergency loan no credit check payday advance payday advance loans - lwaozqby
Posted by Online Essay Help at 2017-12-30 13:58:47argument essays homework help uk argumentative essays university essay help - xmsjmdmr
Posted by JaneRed at 2017-12-30 13:11:31payday loans bad credit bad credit personal loans guaranteed get a personal loan with bad credit fast personal loan - eqbszbeq
Posted by JaneRed at 2017-12-30 02:55:10buy an essay history essay help buy essay website for essay writing - fmaqhvla
Posted by Best Online Loans at 2017-12-29 13:57:36instant online loans cash advance online payday advance payday - zcytnkxy
Posted by Online Loans at 2017-12-29 11:35:22payday loans online payday loans online advance cash payday loan advance cash payday loan - ajqpidrf
Posted by Direct Lenders at 2017-12-29 03:20:35cash advance online payday advance cash loans no credit check cash advance - upidryma
Posted by cheap insurance at 2017-12-28 17:22:27geico auto insurance quotes trustage auto insurance car insurance quotes texas - vphfzdrz
Posted by cheap auto insurance at 2017-12-28 14:18:18car insurance auto insurance companies in florida car insurance car insurance - pfyljuqu
Posted by Good Homework Music at 2017-12-28 13:13:38pay someone to write my assignment essay writing service essay writing service https://essaywritingservice.us.org - essay writing - nshbluli
Posted by Speedy Cash at 2017-12-28 11:15:19payday best cash advance loans online direct lenders payday advance loan - uzlicurm
Posted by Best Payday Loan at 2017-12-28 11:08:07loan cash easiest payday loan to get cash advance cash advance - ribhvqbe
Posted by online car insurance at 2017-12-28 06:39:30michigan auto insurance compare car insurance cheapest auto insurance quotes comparison e insurance auto - krsumkis
Posted by Quick Loans at 2017-12-28 05:04:59loans payday loans online direct lenders payday loans loan - wcoimnvu
Posted by auto insurance quote at 2017-12-28 05:00:30auto insurance quotes online auto insurance quotes auto insurance quotes auto insurance quotes - evgnscql
Posted by Payday Loans at 2017-12-27 23:30:35payday a payday loan payday speedycash - zspsdfvk
Posted by amica auto insurance at 2017-12-27 16:08:39car insurances auto insurance quotes california car insurance quotes general auto insurance quotes - lpkqklai
Posted by Homeworks Of America at 2017-12-26 13:37:06essay my.hrw.com homework help argumentative essay https://essay.us.org - essay - cguuvuic
Posted by Write Essays For Me at 2017-12-26 06:45:19research writing custom dissertation writing college essay prompts college essays - llaokkai
Posted by Write Essay For Me at 2017-12-26 03:59:20buy college essays world religions homework help help on essay https://collegeessays.us.com - college essay help - gthagzjs
Posted by insurance at 2017-12-26 01:48:56compare car insurance quotes car insurance car insurance compare car insurance rates - taqljsxk
Posted by auto insurance rates at 2017-12-25 23:30:04online auto insurance quotes motorcycle insurance quotes online comparison cheap car insurance quotes general car insurance quote - zxypgkwo
Posted by Write My Paper at 2017-12-25 23:12:57research papers research paper research paper homework help college - auibpiiy
Posted by Dog Ate Homework at 2017-12-25 12:43:09research paper research report research essay https://researchpaper.us.com - research paper - lrikwohc
Posted by car insurance quotes at 2017-12-25 11:53:01car insurance quotes texas state farm car insurance auto insurance quotes california auto insurance quotes comparison - ulmgluee
Posted by Homeworks Of America at 2017-12-25 09:26:15argumentative essay argument essays literature review help writing write college essay - djbgkyli
Posted by safeauto insurance at 2017-12-25 09:19:41compare auto insurance quotes car insurance cheap car insurance in california carinsurance - tfblxeli
Posted by Get A Loan at 2017-12-24 19:16:28a payday loan payday payday loans on line payday loans online - pphkpuoi
Posted by cure auto insurance at 2017-12-24 18:10:56car insurance compare car insurance rates car insurance auto insurance quotes comparison - zdsorkcl
Posted by cheap insurance at 2017-12-24 07:58:44the general car insurance florida cheap car insurance nationwide auto insurance cheap auto insurance - yopkxrme
Posted by Easy Payday Loan at 2017-12-24 03:33:25best payday loans cash advance guaranteed payday loans cash advance - bxnstwxv
Posted by erie auto insurance at 2017-12-23 23:23:37rental car insurance car insurance quotes california auto insurance quotes california auto insurance quotes comparison - dtlzests
Posted by car insurance cost at 2017-12-23 23:02:27car insurance cheap auto insurance car insurance usaa car insurance - dfqfbjux
Posted by JamesRed at 2017-12-23 21:22:26cash til payday loan easy online payday loans easy online payday loans easy online payday loans buy admission essay common application essay prompts mymaths online homework common application essay prompts instant online loans payday loans online the best online payday loans quick cash loan same day loan bad credit payday loans direct lenders direct lender payday loans payday loans direct lenders only webcam slut webcam slut webcam slut wife on webcam - fbkrqjns
Posted by Online Payday Loans at 2017-12-22 17:16:52payday payday loans direct lenders only payday payday loan - xrmvcnym
Posted by Loans Online at 2017-12-22 08:09:46payday loans online loans online payday loan loan - hscudrwy
Posted by JamesRed at 2017-12-22 04:37:30uspto assignments database essay writing service essay writing service https://essaywritingservices.us.com - custom essay writing services - xatcfiki
Posted by Best Online Loans at 2017-12-22 04:20:56loan online loan loan online payday loan lenders - xnbvrmco
Posted by Bad Credit at 2017-12-22 03:19:51direct lenders payday loans payday cash loan direct lenders for bad credit payday loans for bad credit - wpdwmwmv
Posted by Payday Loans Online at 2017-12-21 22:21:07loans online loan easy online payday loans loans online - cmxyfsgu
Posted by JamesRed at 2017-12-21 21:38:54college essays college essay college essay https://collegeessay.us.com - essay help australia - gewtdvnk
Posted by Direct Lender Loans at 2017-12-21 19:02:38cash loans loans payday loan loan - usxpglmd
Posted by Paydayloan at 2017-12-21 10:27:49pay day loan cash advance cash advance payday express - hckidktv
Posted by Easy Payday Loan at 2017-12-20 17:33:13payday loan loan emergency loans no credit check easy loans - pcrtxrmv
Posted by Payday at 2017-12-20 13:48:05direct payday lenders online payday loan direct lenders online loans loan - rnetqqfm
Posted by Loans Online at 2017-12-20 08:11:52payday payday payday payday advance loan - tfnmiizj
Posted by Quick Loan at 2017-12-20 04:36:16payday advance cash loans cash advance lenders best cash advance loans online - eclmsbsx
Posted by Assignment Define at 2017-12-20 02:37:53homework hotline online argumentative essay argument essays argumentative essay - mbriygcj
Posted by Write My Papers at 2017-12-19 09:09:20argumentative essay do my physics homework argument essays homework hotline online - qpplduhp
Posted by JamesRed at 2017-12-19 08:02:09write essay write my essay online essay help https://essayonline.us.com - buy essay online - obdpcsdz
Posted by Getting A Loan at 2017-12-19 06:44:36payday loans with no credit check cash advance lenders cash advance money lender no credit check - rjcbiuas
Posted by JamesRed at 2017-12-19 03:14:03college essays college essays help help me with my essay https://collegeessay.us.com - help me do my essay - opzxckbt
Posted by Pay Day Loan at 2017-12-18 21:07:21loan loan get a loan get a loan - ggblgjpm
Posted by Buy An Essay Online at 2017-12-18 06:48:06do my excel project writing my essay for me writing my essay paper writing service - sbwgbhce
Posted by Direct Lender Loans at 2017-12-17 19:22:13loan cash loan cash loan loan - kvridiyp
Posted by Instant Online Loans at 2017-12-17 15:32:45bad credit payday loans direct lenders check into cash the best online payday loans payday - hprvcqrb
Posted by JoeRed at 2017-12-17 09:14:18payday bad credit loan bad credit payday loans direct lenders loans for bad credit payday loans for bad credit - houigran
Posted by JoeRed at 2017-12-16 22:35:55buy essay online writing a college essay about yourself help with essays assignments buy essay papers - yarmqken
Posted by PamRed at 2017-12-16 16:27:35cash advance lenders loan cash loan cash get a loan sex chat free free chat rooms free sex chat free adult chat money loan payday loan direct lender small online payday loans same day payday loans online hot webcam girls free online sex chat strip club webcam hot webcam girls - tdpgnfqd
Posted by Homework Charts at 2017-12-16 02:07:19online dissertations research papers research paper research paper - zxbxxozh
Posted by JoeRed at 2017-12-16 01:46:53next page bad credit payday loans direct lenders speedycash HTTPS://LOANSFORBADCREDIT.US.COM/ - wrbezqpn
Posted by JoeRed at 2017-12-15 21:51:45pay for essay online https://writemyessay.us.com/ online essay writing service online homework - eawicsvf
Posted by Payday Loans Online at 2017-12-15 16:55:06payday payday payday loan online direct payday loan lenders - tfosocii
Posted by My Homework Help at 2017-12-15 11:47:45online dissertations research papers apply texas essay prompts research report - xuoxahwc
Posted by Getting A Loan at 2017-12-15 11:35:48payday cash loan payday loans online payday loans online payday loans - trmqldvp
Posted by JamesRed at 2017-12-15 00:49:07easy loans easy loans easy payday loans easy fast payday loans college essay help college essay help help for math homework college application essay essay help online essay research essay buy dissertation online payday loans direct lenders only payday loan direct lenders direct lenders payday loans payday loans online direct lender direct payday loan lenders bad credit payday loans direct payday loan lenders payday loan direct lenders online loans direct lenders payday loans online direct lenders online loans direct lenders online payday loans direct lenders payday loans bad credit payday bad credit loan bad credit payday loans payday bad credit loan homework help.com math do homework online help writing a narrative essay how to write a term paper college essay cheap research paper writing service help with essays assignments college essay writer - rtiemybz
Posted by JamesRed at 2017-12-15 00:03:37help with writing essays order essay paper essay buying https://buyessay.us.com - buy an essay cheap - zryeyxor
Posted by JoeRed at 2017-12-13 17:31:05payday loans online payday loans direct lenders online payday loan online payday loans no credit check - hgnoxndm
Posted by JoeRed at 2017-12-13 01:53:53best essay writing services Continue Reading what is the best essay writing service essays writing services - qcvudcpz
Posted by JoeRed at 2017-12-12 22:16:19payday loans online pay day loans pay day loans payday loans online - ofwrkenu
Posted by JoeRed at 2017-12-11 08:53:16write my essay found here http://WriteMyEssay.us.com custom essay writing - tuvtemvq
Posted by JoeRed at 2017-12-10 02:14:38write my essay help me with my essay write an essay essays - nwayxzkr
Posted by JoeRed at 2017-12-09 18:20:32payday loans for bad credit https://loansforbadcredit.us.com/ emergency loan no credit check payday bad credit loan - vzrdcpfu
Posted by JoeRed at 2017-12-09 15:17:10bad credit payday loans payday loans for bad credit bad credit best online payday loans - ixxdzzmt
Posted by Best Payday Loan at 2017-12-09 10:16:05payday payday loans direct lenders only payday loans no credit check the best online payday loans - zdbsbbgr
Posted by Speedycash at 2017-12-08 18:36:33direct online lenders online payday loans instant approval loan online installment loans - zsxiqiyz
Posted by Online Payday Loan at 2017-12-07 11:03:38direct lenders payday loans cash advance cash advance payday lenders direct - mvibqvup
Posted by Writing Essay Online at 2017-12-06 20:49:07argument essay paper writing argumentative essay argumentative essay - cskdagaz
Posted by JoeRed at 2017-12-06 14:11:59adult webcam live webcams sex webcam sex webcam porn - wtrwqemf
Posted by Buy College Essays at 2017-12-06 14:04:52college essays college essay help college essay help help in writing an essay - irrxzkrp
Posted by Write An Essay at 2017-12-05 13:42:29research essay research papers research paper research paper - pijyzeho
Posted by JamesRed at 2017-12-05 10:41:07found here payday loans online http://OnlineLoans.us.com/ https://onlineloans.us.com/ - online payday loans - rzlvabfk
Posted by JamesRed at 2017-12-05 06:31:12college essay help with college essay writing i need help writing an essay https://collegeessay.us.com - college essay - pvhqybto
Posted by Payday Loan Online at 2017-12-02 18:54:58fast easy loan short term quick loans quick payday loans online quick loans online - hbgqckcq
Posted by Quick Loans at 2017-12-02 13:34:11payday loans bad credit bad credit personal loans personal loans bad credit reviews easy personal loan - yenceuvr
Posted by JamesRed at 2017-12-01 08:28:17payday loans online direct lenders instant approval PAYDAYLOANS.US.ORG payday loans https://paydayloans.us.org/ - payday loans online - irocvkcq
Posted by JoeRed at 2017-12-01 01:11:13order essay online order essay college essay writer for pay buy essay - ljrrgbnx
Posted by JoeRed at 2017-11-29 18:17:40buy essay online Visit Your URL https://writemyessay.us.com writemyessay.us.com - gtbowufg
Posted by JamesRed at 2017-11-29 18:12:18home helpful resources online payday loan https://onlineloans.us.com/ - for more - tdvcugwl
Posted by JoeRed at 2017-11-29 15:36:49loans online online payday loans http://OnlineLoans.us.com/ payday loans online - oplygxyg
Posted by JamesRed at 2017-11-29 12:38:05http://loansforbadcredit.us.com/ payday loans for bad credit HTTPS://LOANSFORBADCREDIT.US.COM/ https://loansforbadcredit.us.com/ - payday loans bad credit - dylyswmi
Posted by JoeRed at 2017-11-29 03:59:18loans online bad credit payday loans for bad credit payday loans bad credit payday loans for bad credit - xhewnqhy
Posted by JoeRed at 2017-11-28 03:55:04online payday lenders instant online payday loan easy payday loans online payday loans online - jiblnira
Posted by JoeRed at 2017-11-28 00:33:10ESSAYWRITINGSERVICES.US.COM how to write a good argument essay custom essay writing services essay writing service recommendation - xzhlwwjv
Posted by Essay Writings at 2017-11-27 22:01:44essay writing help online buy college essays college admissions essay help descriptive essay help - tsavasar
Posted by JoeRed at 2017-11-27 14:55:19fast loans online quick cash loans how to get a small loan fast quick loans - lsnfirff
Posted by Help With My Essay at 2017-11-27 13:23:54buy essay online buy essay online buy essay without getting caught pay for college essays - fgufzlnt
Posted by JoeRed at 2017-11-27 05:11:37quick loan payday loan online https://onlineloans.us.com/ Get the facts - dbrucvip
Posted by PamRed at 2017-11-26 12:30:27mla research paper buy homework papers research report homework help online chat loans online instant approval payday loans direct lenders only direct lender loans direct lender loans online sex cam slut cams slut cams xxx web cams payday loan online best payday loan online instant online payday loan best payday loan online instant online payday loan online payday loans instant approval online payday loans instant approval online payday loan instant approval college essays buy essays online argumentative essays medical school essay - bkvysvgn
Posted by JamesRed at 2017-11-26 09:21:46payday loans payday loans online payday loans online direct lenders only https://paydayloans.us.org/ - payday loans online - dvocmnci
Posted by Speedy Cash at 2017-11-25 16:33:46fast payday loans direct lender quick cash loans quick loans online loans quick approval - ljvelixn
Posted by Online Essay Help at 2017-11-25 13:25:30writing an essay help buy an essay online i need help writing an essay buy essays - ipjkwcby
Posted by Web Assign Utah at 2017-11-25 12:45:12buy an essay paper help with essay writing buy an essay paper essay online help - dxruouji
Posted by Direct Lenders at 2017-11-25 08:28:20unsecured personal loans bad credit ok personal loans with bad credit personal loans bad credit payday loans bad credit approval - vrwnatcb
Posted by JoeRed at 2017-11-24 07:54:03quick cash loans bad credit get loan fast quick loans online quick cash loans - qokwffea
Posted by JoeRed at 2017-11-24 00:53:50short loans short term loans colorado no doc loans short term loans no credit checks - zfmmlhrf
Posted by JoeRed at 2017-11-23 19:39:09loans payday loans for bad credit payday loans for bad credit payday loans for bad credit - nephauro
Posted by JoeRed at 2017-11-23 15:50:47website for essays in english buy essay online help writing college essays order essay online - dpezsmxk
Posted by JoeRed at 2017-11-22 02:55:26live chat webcam sex webcam sex live chat - lvrfpkor
Posted by JoeRed at 2017-11-21 19:08:19short term quick loans short term payday loans loans short term unsecured signature loan - bdpwrxwq
Posted by JoeRed at 2017-11-21 15:52:16short term bad credit loans fast loans no credit check loans with bad credit and monthly payments nevada payday loan - trwlgikg
Posted by PamRed at 2017-11-21 11:47:28direct lender loans direct lender payday loans direct lender payday loans direct payday loans best online payday loans cash payday loans online best payday loans online short term loans direct lenders payday loans on line best pay day loans cash loan guaranteed payday loans assignment help australia writing my paper cengage online homework paper writing service direct lender loans fast loans no credit check faxless payday loan same day direct lender payday loans - fvmuykcm
Posted by PamRed at 2017-11-20 21:45:52college essay help college essay help college essay college essay help direct lender loans payday loans online direct lender direct lender loans direct lender payday loans chat room webcam sex chat free sex webcam sex webcam pay day loans payday loans direct lender direct lender loans payday loans direct lender chat sex girls chat chat sex free bbw cams custom essay writing can t do my homework custom essay writing custom essay writing payday loans direct lenders only direct lenders of loans bad credit loans direct lenders direct lenders payday loans payday loans direct lenders only online payday loans direct lenders payday loans direct lenders only direct lenders payday loans cash advance advance payday loans online advance payday loans online online loans buy essays online buy essays online buy essays online buy essays - pmfncwir
Posted by PamRed at 2017-11-20 12:27:01webcam amateur amateur webcam girls porn chats webcam sluts online payday loan lenders payday loans no credit check quick loan installment loans no credit check direct payday loans direct lender payday loans emergency loans no credit check direct lender loans do my math homework school papers buy research paper do my math homework online loans direct lenders online payday loans direct lenders direct lenders payday loans payday express easy payday loan easy payday loan easy payday loan payday loan online same day loan same day loan same day loan pay day loan write my paper for me write my essay for me write my paper for me essay service custom essay writing paper writing service custom essay writing custom essay writing fast online payday loans fast online payday loans the best online payday loans the best online payday loans - ntgfjqpc
Posted by PamRed at 2017-11-20 07:20:20guaranteed payday loans bad credit payday loans direct lenders direct payday lenders online guaranteed payday loans direct payday lenders online online payday advance loan online payday advance loan online payday advance loan loans with no credit check no credit check emergency loans instant payday loans internet payday loans - ffarjwvk
Posted by JoeRed at 2017-11-20 03:05:57best payday loan payday loans for bad credit Home Page bad credit payday loans - deedtmdv
Posted by Online Loan at 2017-11-19 01:48:05quick personal loans quick loans quick loans no credit check quick loans - ibxsdbkk
Posted by Online Lenders at 2017-11-18 21:41:02quick loans fast cash loans with bad credit quick small loans personal loans quick approval - autsxskd
Posted by Write My Essay Cheap at 2017-11-18 04:10:36buy essay online cheap write a college essay buy essay online buy essay - ectvtkkj
Posted by Write Essays at 2017-11-17 22:37:18buy college essays essay writing for college students college essay online writing a college essay about yourself - uwlkgklq
Posted by Write College Essays at 2017-11-17 16:38:58writing essay for college college level essay writing need help with essay university essay help - xilblkbo
Posted by JoeRed at 2017-11-16 14:42:47personal loans for bad credit bad credit personal loans bad credit personal loans personal loans with bad credit - ufdygweh
Posted by JamesRed at 2017-11-14 19:38:03cash til payday loan best payday loan online best payday loan best payday loan online direct lenders payday loans fast payday loans payday loan direct lenders payday loan direct lenders direct lenders online loans online payday loan lender direct online lenders payday loans direct lenders online payday loans online payday loans online payday loans payday advance write my paper write my paper research paper proposal help with finance homework - jbbuyata
Posted by JamesRed at 2017-11-14 13:28:54payday lenders direct loans online payday lenders direct payday lenders direct payday loan online best payday loan payday loan online best payday loan online research paper proposal research report roman homework help essay homework help writing homework help managerial accounting homework help write my paper for me write my paper for me direct loan lenders direct loan lenders internet payday loans direct loan lenders - renaubif
Posted by Loans at 2017-11-13 07:37:02quick cash loans quick cash loans in tennessee quick loans loans quick cash - lzcfhuch
Posted by Payday at 2017-11-13 02:08:47short loans short term loans bad credit on line loans loan market - idufjuxb
Posted by Instant Online Loans at 2017-11-12 18:24:14personal loans bad credit best personal loan rates personal loans for bad credit payday loans bad credit ok - rzcsmtwb
Posted by Payday at 2017-11-12 07:36:00quick loans quick payday loans fast no credit check loans quick personal loans - cqrxgkzo
Posted by Speedy Cash at 2017-11-12 03:13:11payday loans for bad credit in pa get personal loan payday loans bad credit ontario how to apply for a loan with bad credit - tiysbmuc
Posted by Payday Express at 2017-11-11 16:19:23personal loans bad credit best personal loan interest rates bad credit personal loans reviews bad credit payday loans - bwppjell
Posted by JoeRed at 2017-11-11 01:49:17loans quicken quick loans for bad credit no credit loans fast personal loans quick - kxuibvmg
Posted by JamesRed at 2017-11-10 13:14:12buy an essay cheap buy essay online buy an essay online https://buyessay.us.com - help with essay writing for university - fjzwjdtn
Posted by Payday Loans Online at 2017-11-10 02:30:42fast loans online where can i get a quick loan quick loans online quick loans for bad credit - wccvosoe
Posted by JamesRed at 2017-11-10 01:57:46easy approval payday loans same day payday loans no credit check payday cash advances easy approval payday loans direct lenders online loans best online payday loans payday loans online direct lenders online loans direct lenders best website for essays i need help with my geometry homework cheap research paper writers application essay direct payday loan lenders payday lenders direct payday loans direct lenders direct payday lenders free porn cams free porn cams live cam porno online slave training small online payday loans online loans online payday loans loans online the best online payday loans best online payday loans payday cash advance loan small online payday loans free adult video chat free adult video chat free sex video chat live webcams sex direct payday loan lenders online payday loan lenders payday loan direct lenders direct payday loan lenders - esauruhj
Posted by Payday Loan at 2017-11-09 22:28:13loans for bad credit people las vegas payday loan loan places microloan - kjexdqva
Posted by JamesRed at 2017-11-09 19:34:30buying an essay buy essay buy essay without getting caught https://buyessay.us.com - order essay now - fyggdzja
Posted by Easy Payday Loan at 2017-11-09 17:26:15get cash now with bad credit bad credit personal loans online payday loans for bad credit in texas personal loans bad credit - psdylmix
Posted by Write Assignment at 2017-11-09 13:52:48need help with essay buy essay online buy essay buy essays online - sotbvlko
Posted by JamesRed at 2017-11-09 13:16:39writing a paper writing my paper paper writing service writing a paper research report research papers university of texas essays biology homework help writing a paper online homework solutions marketing homework help writing a paper web assign help write my paper for me writing college essay how to write a term paper online payday loan payday loan online fastest payday loan best payday loan advance cash payday loan easy cash payday loan easiest payday loan to get payday loans lenders cash loans payday advance loans advance payday loans online payday advance loan - jznjtbsf
Posted by Loans For Bad Credit at 2017-11-09 13:09:08payday loans quick cash quick loans quick loans no credit check quick cash loans today - qnsqxilr
Posted by Paydayloan at 2017-11-09 10:36:34guaranteed payday loans bad credit personal loans bad credit guaranteed payday loans for bad credit near me bad credit personal loans - vkjswoji
Posted by JoeRed at 2017-11-09 02:26:02buy essay writing help in essay writing pay for college essays order essay online - ohomskzh
Posted by Good Homework Music at 2017-11-09 01:33:52buy college essays online college essay prompts college essay prompts buy college essays online - muohwqhd
Posted by Assignment Notebooks at 2017-11-08 21:51:23buy an essay paper buy essay online buy essay buy essay - wgqsmbci
Posted by Write Assignment at 2017-11-08 15:20:40essay writing help online help me write a essay college essay service buy college essays online - aahtrjmy
Posted by JoeRed at 2017-11-08 14:32:24my paper writer website to write essays write my essay online write - ytycivmy
Posted by JoeRed at 2017-11-08 12:35:26admission essay writing services Look At This essay writing service review essay writing service - ovkmytuo
Posted by Homework Help Online at 2017-11-08 05:42:32assignment essay help writing a college entrance essay help on essay writing writing the college essay - evfzdgmf
Posted by JoeRed at 2017-11-08 05:35:19Visit Your URL online payday loan link view homepage - fwevzktq
Posted by JoeRed at 2017-11-08 02:24:16More Help online essays buy essay online write essay - lstkusip
Posted by Online Essay Writer at 2017-11-07 18:08:55buy an essay buy essay online cheap order essay paper online essay - evmsdzer
Posted by Essays Writing at 2017-11-06 06:36:27help with writing an essay buy an essay online buy an essay paper paying college athletes essay - hlnkgvvk
Posted by Get A Loan at 2017-11-05 23:39:53quick loans quick cash loans in tennessee quick personal loans in new york fast loans - wlhwpuwm
Posted by Buy A Essay at 2017-11-05 19:23:45help writing a college essay college essays buy college essays college essay prompts - grpqsyfr
Posted by Best Online Loans at 2017-11-05 19:05:31payday loans bad credit today personal loans dallas tx bad credit payday loans legit payday loans for bad credit - ligibsdp
Posted by Quick Loans at 2017-11-05 15:58:38quick loans quick loans no credit check quick personal loans in new york quick personal loans in new york - iuqlyisa
Posted by Direct Lender Loans at 2017-11-05 04:22:13quick and easy loans online quick cash loans today easy to get loans with bad credit quick online loans for bad credit - aovqbukk
Posted by JamesRed at 2017-11-05 00:33:21online payday loan lenders Learn More Here quick loans https://onlineloans.us.com/ - online payday lenders - usowofdk
Posted by JamesRed at 2017-11-04 06:57:39how to become a better essay writer essay writing service name one of the writers of the federalist papers https://essaywritingservices.us.com - best essay writing services - uqqoapwg
Posted by Spotloan at 2017-11-04 02:18:15quick and easy loan quick and easy loan fast loans no credit loans quickly - htlhpodi
Posted by Easy Payday Loan at 2017-11-03 22:39:50real online loans for bad credit payday loans for bad credit near me payday loans bad credit online payday loans for bad credit in pa - psoqffsa
Posted by JamesRed at 2017-11-02 19:39:08professional essay writing services essay writing service buy essays papers https://essaywritingservices.us.com - essay writing services review - hzmjntbx
Posted by JoeRed at 2017-11-01 15:40:05HTTP://WRITEMYESSAY.US.COM online essay online essay writing custom essays - ekqczxus
Posted by JoeRed at 2017-11-01 12:59:25payday loans online payday express payday loans online direct lenders no teletrack online payday loans - tiwafynj
Posted by Speedy Cash at 2017-11-01 07:50:44short term bad credit loans short loans greenwood loans where can i get a personal loan - ertxejuw
Posted by JoeRed at 2017-11-01 06:49:54https://essaywritingservices.us.com connect online homework college essay writing services essay writing tip - gucqmswe
Posted by JoeRed at 2017-11-01 03:29:28found it write my essay online essay online online paper writer - cvssrekj
Posted by JoeRed at 2017-10-31 17:54:20short term loans short term cash loans short term payday loans loan guarantee - wsjmvgen
Posted by Assignment Helpers at 2017-10-30 07:41:05buy essay buy an essay buy essay online cheap essay buying - vldsdxll
Posted by Buy Essay.Org at 2017-10-27 00:41:15college essay prompts help with college essay college essays college essay prompts - mguswnre
Posted by Buying Essay at 2017-10-26 18:52:42college admission essay writing service writing college essay college essay online college level essay writing - hecjiojn
Posted by Write Assignment at 2017-10-26 06:52:27essay buy buy essay online buy essay online buy an essay - xgthihmy
Posted by Payday Loan at 2017-10-26 05:30:40quick loans for bad credit fast loans quick loans no credit check fast loans - dnlfcwru
Posted by Direct Lender Loans at 2017-10-26 01:54:41quick cash loans quick text loans quick personal loans loans quick and easy - tsnvyage
Posted by JamesRed at 2017-10-25 21:25:20essay writing service how to write a community service essay Web Site https://essaywritingservices.us.com - essay writing service - qjdpnxbw
Posted by JamesRed at 2017-10-25 16:44:44personal loans payday loans online payday loans online https://paydayloans.us.org/ - payday loans online - enybvuga
Posted by Fastest Payday Loan at 2017-10-25 16:11:11loans personal payday loans for bad credit in pa bad credit payday loans payday loans for bad credit online - bmtecqfr
Posted by A Payday Loan at 2017-10-25 12:00:49short loans short term loans loans for bad credit people short loans - qvtdpszc
Posted by JamesRed at 2017-10-20 20:28:52admissions essay help narrative essay help i need help writing a essay https://collegeessay.us.com - write my college essay for me - pqakxmas
Posted by JamesRed at 2017-10-19 14:03:57bad credit payday loans direct lenders payday loans for bad credit loans for bad credit https://loansforbadcredit.us.com/ - payday loans for bad credit - ljtfduaz
Posted by Fastest Payday Loan at 2017-10-17 06:45:10loans for bad credit payday loans online payday loans best payday loans online - zkwmijro
Posted by Buy Essay Papers at 2017-10-17 03:19:24more information essays writing services more information Our site - elixxmda
Posted by JamesRed at 2017-10-17 02:57:09payday loans online payday loans online online payday loans payday loans online direct lender - lervjhur
Posted by JamesRed at 2017-10-17 00:42:33payday loans online payday loans paydayloansonline.us.com payday loans online - cafvnvsv
Posted by Online Essay Writing at 2017-10-17 00:14:17essay writing service buy essays cheap article source affordable essay writing service - sntstvfm
Posted by Cash Loan at 2017-10-16 21:45:41easy payday loan payday bad credit loan loans online bad credit Go Here - lpkqqcbm
Posted by Online Lenders at 2017-10-16 16:57:15payday loans online payday loans online california payday loans online payday loans online - krawgxut
Posted by Assignment Define at 2017-10-16 12:32:56buy essay online write my essay online buy essay online homework help online - ypvaiwbk
Posted by JamesRed at 2017-10-16 07:04:37buy essay online buy essay online buy cheap essays online HTTPS://WRITEMYESSAY.US.COM - foqebpzt
Posted by Write College Essays at 2017-10-15 04:08:25custom essays buy essay online HTTP://WRITEMYESSAY.US.COM/ essay online - igrkqtzn
Posted by JamesRed at 2017-10-12 22:33:14essay writing services uk admission essay writing services essay writing service review admission essay writing service - hogdfecn
Posted by JamesRed at 2017-10-12 05:28:59online payday loan payday loan online payday loans online online loans - vuxjjaap
Posted by JamesRed at 2017-10-12 02:27:19sex chat sex chat free free adult sex chat cam online - zdztdxmp
Posted by JamesRed at 2017-10-11 21:57:44sex chat free adult sex chat free cam chat sex sex chat - xmcsavtt
Posted by Easy Payday Loan at 2017-10-10 23:41:21payday loans payday loans online payday loans online emergency payday loans online - ekdkpvvl
Posted by Loans For Bad Credit at 2017-10-10 00:59:50online loans payday loan online HTTP://ONLINELOANS.US.COM/ online loans - koqwjkcm
Posted by Direct Lenders at 2017-10-09 13:18:23online payday loans online payday loan paydayloansonline.us.com Continue Reading - vyllgmdc
Posted by Speedycash at 2017-10-09 08:31:00Resources payday loans for bad credit online lenders payday loans for bad credit - ojhpnjyo
Posted by JamesRed at 2017-10-09 01:20:50payday loans online payday loans online direct lenders only payday loans online https://bestpaydayloansonline.us.com/ - payday loan - jrrdydof
Posted by JamesRed at 2017-10-08 04:56:18click for source payday loans online pa payday loans online https://bestpaydayloansonline.us.com/ - More Help - qiqsbnvi
Posted by Direct Lender Loans at 2017-10-07 04:33:47online payday loans no credit check monthly payday loans online payday loans online payday loans online - mdtomnpy
Posted by Personal Loans at 2017-10-07 00:58:33payday loans payday loans online payday loans direct lenders payday loans online - neimfkpw
Posted by Online Loan at 2017-10-06 20:27:55cash loan payday loans for bad credit fastest payday loan best payday loan - phlyfvtj
Posted by JamesRed at 2017-10-06 12:10:52custom essay writing write my essay for me cheap custom essay https://writemyessay.us.com - custom essay writing - eocoxkvu
Posted by JamesRed at 2017-10-06 09:09:23sex chat porn sex video chat freesexchat.us.com https://freesexchat.us.com - live sex chat - pivjqlzu
Posted by JamesRed at 2017-10-06 02:56:16payday loans online payday loans payday loans online https://paydayloans.us.org/ - payday loans direct lenders - dtczgwam
Posted by JamesRed at 2017-10-05 18:39:46a little more homework write essay service google essay writer https://essaywritingservice.us.com - essay writing service - tcbjuuji
Posted by JamesRed at 2017-10-05 07:42:07payday loan online online payday loan https://onlineloans.us.com/ https://onlineloans.us.com/ - online loans - rdxdqmby
Posted by Premium Assignments at 2017-10-05 02:13:46pay to write essays pay to write essays custom essay writing custom essay - zmvpuyql
Posted by JamesRed at 2017-10-04 21:21:59payday loans Your Domain Name Full Report https://bestpaydayloansonline.us.com/ - payday loans online no credit check - hrugwuxf
Posted by JamesRed at 2017-10-04 12:53:33write essays professional essay writing service essay writing service review https://essaywritingservices.us.com - college essay writing services - xyxkcvgj
Posted by Web Assign Utah at 2017-10-03 09:35:11write my essay write essay for me write my essay https://WriteMyEssay.us.com/ - jepgrdeh
Posted by Fastest Payday Loan at 2017-10-01 15:29:23loans for bad credit pay day loans payday loans payday loans - vexdxdrr
Posted by JamesRed at 2017-09-30 11:18:17essays writing services buy essays online cheap buy essay papers https://essaywritingservices.us.com - essays writing services - acfpjdft
Posted by JamesRed at 2017-09-29 13:02:11payday loans for bad credit payday loans for bad credit Our site https://loansforbadcredit.us.com/ - payday loans for bad credit - zthywpxp
Posted by JamesRed at 2017-09-27 16:15:09payday loans online online payday loans texas payday loans online https://bestpaydayloansonline.us.com/ - payday loans online - kivtaazs
Posted by JamesRed at 2017-09-27 04:59:20college essay writing services law essay writing service scholarship essay writing service https://essaywritingservice.us.com - best essay writing service reviews - gzfiixdl
Posted by JohnRed at 2017-09-26 10:51:11https://essaywritingservices.us.com/ - buy college essays https://loansforbadcredit.us.com/ - payday loans for bad credit - mjshahli
Posted by JohnRed at 2017-09-25 02:08:10https://loansforbadcredit.us.com/ - cash loan https://writemyessay.us.com/ - write my essay cheap - umkvkzfb
Posted by JohnRed at 2017-09-24 09:50:00https://essayonline.us.com/ - HTTPS://WRITEMYESSAY.US.COM/ https://loansforbadcredit.us.com/ - fast loans no credit check - auvbvjvu
Posted by JohnRed at 2017-09-23 18:25:51https://bestpaydayloansonline.us.com/ - payday loans - dqnxqzcx
Posted by JohnRed at 2017-09-23 02:14:08https://bestpaydayloansonline.us.com/ - payday loans online - oyeaaspp
Posted by JohnRed at 2017-09-22 10:19:43https://paydayloans.us.org/ - payday loans online direct lenders - wwuileqz
Posted by JohnRed at 2017-09-21 02:53:25https://paydayloans.us.org/ - payday loans - jwbbxglk
Posted by JohnRed at 2017-09-20 03:06:22https://paydayloans.us.org/ - cash advance - odpkumfp
Posted by JohnRed at 2017-09-18 19:17:49https://paydayloans.us.org/ - payday loans online - 543dzjbx
Posted by Jamesabend at 2017-09-16 13:10:32online payday loans - 15w4op2x
Posted by Jamesabend at 2017-09-15 20:55:07payday loans - oof11fte
Posted by Brettbip at 2017-09-14 13:27:57generic celexa - laj9x35s
Posted by AaronEnron at 2017-09-14 06:34:44bupropion zyban generic tadalis sx tadacip 20 mg citalopram 20mg tablets - xol44s23
Posted by Mikeduche at 2017-09-13 22:59:53loansforbadcredit.us.com paper writer - qf16of34
Posted by ascofxz526m at 2016-04-15 05:13:32motilium canada - Clever!!
Posted by Siobhan Green at 2014-03-31 21:39:41Wow.